Wednesday, July 27, 2011

Grocery Shopping in the Backyard - Garden Update July 2011

There is almost nothing as satisfying to me as walking out my backdoor and harvesting a weeks worth of produce, at almost no cost. Lettuce, cucumbers, green beans, zucchini, summer raspberries, tomatoes and herbs, all abundant and ready for picking in my backyard urban garden. Since we built our raised beds last year, there have been very few costs associated with growing food this year; a few bags of nutrients to amend the soil, some pouches of seeds, and a little bit of (pleasurable) work every few days. We didn't spend more than $75 and have gotten a whole lotta return on our investment! 
(check out one of the more bountiful evening harvests from this month, below)

Beyond just the money we save, the impact that it has on my children, and the neighborhood kids who stop by to munch is unquestionable. They love the fresh vegetables, and enjoy picking them too (notice my son hugging the tomato plant, he actually told me to wait to take the picture so he could do that...) It doesn't get much better than this.
In recent years, the urban gardening and local food movement have been largely associated with middle or upper middle class white folks. This should not, and need not be the case. Growing food used to be a necessity for poor people, but with urbanization, the establishment of housing projects, and generations of knowledge being lost, both about growing and cooking food, well, it is going to take some work to bring this process back into the lives of the general public, but it is happening now across the country, and will continue on, I have no doubt.

I recently attended an event at Common Ground High School where I spoke with a parent of one of the students. She said she now grows food at home, inspired by her son. For every school garden or urban farm there are dozens of families who will start growing their own food. To me, that is reason enough to get involved.
For information on a few great urban farming and gardening organizations you can check out:

Growing Power - Milwaukee, WI
Nuestras Raices - Holyoke, MA
The Food Project - Lincoln, MA
Edible Schoolyard - Berkeley, CA + more
Added Value - Brooklyn, NY
Brooklyn Grange - Brooklyn, NY
Grow New Haven - New Haven, CT
New Haven Farms - New Haven, CT


Are you growing anything this season? Leave a comment below.
Click here to return to the home page and read more posts.

Sunday, July 24, 2011

Simple Summer Ice Cream & It's Healthy!

I am a bit of a fanatic when it comes to ice cream. I have dreamed of opening an ice cream store for much of the past 7 years but with all the food activism work, parenting and focus on healthy food I haven't managed to give myself the permission to make ice cream for a living...just for fun.

My first professional experience making ice cream was during a brief stint working at Gramercy Tavern in NYC. Dozens of egg yolks, cream sugar, herbs, fruit, tea, malt powder...it was a dream of richness; perfect custards, frozen into a soft creamy heap, chilled and served up within hours. No stabilizers, additives, just the essentials. For years I made ice creams at home based on those recipes. Experiements with herbs I'd grown or fruits I'd picked made for wonderful flavors to share with friends: raspberrry rhubard ripple, watermelon mint sorbet, cardamom orange pistachio brittle, or jasmine tea were among my favorites. It was great fun, although fattening and expensive.
These days, I'm often making ice cream as a last minute dessert, pulling my ice cream maker bowl from the freezer while preparing dinner, with no time to cook and chill a custard. If you are going to eat the ice cream within an hour or two of making it, there is no need for cream, egg yolks or custards. A blender, and an assortment of fruits, and a liquid of your choosing: milk, coconut milk, soy milk, juice all will suffice. Make a smoothie in the blender, add a little sweetener if desired, and pour into your ice cream maker. In about 30 minutes you will have delicious ice cream to enjoy, or put in a container in your freezer where it will hold for an hour or two before becoming very hard. 

For the best results, the smoothie should be thick and creamy, not watery. Sugar or other sweeteners, alcohol and fruits that don't freeze hard such as bananas, pineapple or mangoes all help to create a creamy ice cream, since they prevent the mixture from freezing as solid.

The lovely pink ice cream cone pictured here is similar to the strawberry coconut version below, but I added some brown sugar and banana for sweetness and creaminess.

Note: Foods taste less sweet once they are frozen. So your unfrozen puree should be slightly sweeter than the desired sweetness of your final frozen ice cream.

Here are a few simple no custard ice creams you can try:

Strawberry Coconut Milk Ice Cream


Lemon Verbena and Blueberry Ice Cream


Chocolate and Banana Ice Cream - from David Lebovitz
photo credit: David Lebovitz


If you'd like a little NYC ice cream envy, just to torture yourself...check out this wonderful selection at the Smorgasburg, a great new outdoor food market (from the Brooklyn Flea). If you are in New England, there are endless independent ice cream shops...I'm sure you know more than one or two right?

And, if you've got any great ice cream tricks up your sleeve or favorite ice cream spots...
please share by commenting below!

Wednesday, July 20, 2011

Mexican Roasted Corn

I have never lived in Mexico, much to my dismay, but I have lived in Brooklyn, where Mexican, and Latin American cooking is alive and well. My first taste of this fabulous culinary creation was 7 years ago at the food carts by the soccer fields in Red Hook, Brooklyn. I still remember watching the corn being roasted on an open flame, slathered with mayonnaise, sprinkled with grated cheese and chili pepper and served with a wedge of lime. The combination was, and is addictive, and I have not stopped dreaming of it since.

Roasting corn on a gas stove or grill is quick, easy and fun. No boiling required. Top it with whatever you like, salsa, pesto, butter and salt, but before you reject the idea of mayonnaise on corn, please try this just once, you will be happy you did. 

Mexican Roasted Corn
Fresh corn on the cob - shucked
Mayonnaise
Grated cheese - such as pecorino romano or parmesean, or from a latino grocery store.
Chili powder (optional)
Limes - cut into wedges
  1. Place corn cob over grill or gas stove flame. Cook until some of the kernels begin to blister and brown. Turn corn until all sides are roasted. 
  2. Spread a thin coating of mayonnaise over a corn cob, sprinkle with grated cheese, a dash of chili powder and finish or serve with a wedge of lime. Eat immediately!
If this post gets you excited about roasting corn and not having to set a large pot of water to boil in triple digit heat, then check back soon for a wonderful recipe for roasted corn and peach salad. 

Did you try roasting some corn? Let me know if you liked it!

Sunday, July 17, 2011

A Farm Grows in New Haven

5 hours, 2 vacant lots, 70 volunteers, 4 wheelbarrows, dozens of shovels and rakes, tray upon tray of seedlings, a ton of passion for bringing fresh food to people who otherwise wouldn't have it, and a farm is born. Mark your calendar, because today, July 17, 2011 the first two parcels of New Haven Farms have sprouted to life.

There is an incredible movement across the nation, and around the world to bring the process of growing and eating fresh food back into people's lives, and the city of New Haven is no exception. In fact there are quite a few schools and organizations here who are doing just that. This new group, New Haven Farms started earlier this year as a result of the successful garden at the Fair Haven Community Health Center as part of their diabetes prevention program and a partnership with the local bakery, Chabasso who donated the land. The new farms are located on vacant lots, donated and leased by the city and will grow food as part of a low cost Community Supported Agriculture (CSA) modeled farm where shareholders will get a weekly portion of produce from the farm's harvest. "New Haven Farms’ mission is to promote health and community development through urban agriculture."
The amount of work and commitment that went into making this day possible was incredible, and it showed. A dedicated group of local volunteers have spent months refining a vision, acquiring land, testing soil, and finding donations of tools and soil. Students from the Fair Haven School grew the seedlings in their roof top greenhouse and volunteers from around the city, and around the world helped to build and plant the garden today. What is next? Well, we'll have to watch it grow and lend another hand when needed...
Maria-Luz - checking in with her children while planting tomatoes, helps out in the 
Fair Haven Health Center Garden and lent a hand establishing the new farm!
Rebecca Kline, the passionate leader of this project taking a moment 
to bask in the glory of this new beginning.


As if a new urban farm wasn't enough, 3 new school gardens are getting started this summer... more posts on that soon.

Tuesday, July 12, 2011

Summer Drinks - Installment II

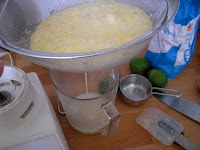
This wonderful and unusual recipe has it's origins in a trashy romance novel. Yes, I know it's shocking to think that I would read such things, but on occasion I have been known to peruse the pages of one of those thick paperback books with a cheesy photo on the cover.  As is consistent with a life time of reading books with prominent food scenes: I don't remember the name of the book or almost anything about the story except that the woman in it wanted to own a cafe (big surprise I picked that book right?) and in a scene about half way through the book she makes the man whose heart she wants to win, this amazing lemonade. Now, this is not your average lemonade, she made it using the whole lemon, skin and all, and the recipe was described in such detail and with such ease, that I imagined it must have been the author's old family recipe handed down from generation to generation....
I never took the time to research whether this recipe was a result of the author's imagination or a real-life regional signature beverage, but it is always a smash hit at a summer party, so I just revel in the discovery of it and am thankful I bought that trashy novel in an airport bookstore so many years ago. I don't remember the exact measurements used in the book, just the general idea, but it always seems to turn out well. Just chop up some lemons or limes, throw them into a blender with some sugar and water, blend the heck out of it and strain off the juice from the pulp. What results is an incredible mix of sweet, sour and bitter. There is a heightened citrus flavor from the oils in the peel, and the slight bitter taste from the pith adds depth and interest without being overpowering. It is incredible just poured over ice, but would be fabulous with mint, seltzer or if you drink alcohol, it would take well to spiking. This is truly a summer time jem, so try it out now before summer is gone and the craving for lemonade is but a fuzzy memory.
Bitter Lemon or Limeade
4 lemons or limes, cut into eighths.
3/4 -1 cup sugar
4-6 cups water (more if you like)

Equipment:
Blender
Mesh strainer
Pitcher
  1. Put lemon or lime pieces into a blender with 3/4 cup sugar and as much water as will fit. Blend on high speed until the fruit is chopped into small pieces. 
  2. Place the mesh strainer over a pitcher (or a bowl if that is easier for you) and pour out the contents of the blender into the strainer. Return the fruit pulp to the blender and add the remaining water. Pulse and blend again for a few seconds to extract more flavor from the fruit. Strain the pulp through the mesh sieve again and mix all the juice together.
  1. Taste the juice and adjust the sweetness if necessary. Serve over ice with a slice of lemon or lime, or muddle with mint if you like. A Splash of seltzer would also turn this into a fabulous spritzer. Serve immediately or refrigerate for up to 24 hours. 
 Discover any great new beverages this summer?

Tuesday, July 5, 2011

Strawberry Jams - The Best I've Ever Had

This late night experiment in Strawberry Jam making was thrilling, exhausting, and luckily successful! Thank god, because if I had wasted 6 pounds of gorgeous fresh picked berries, on some gloppy mess of jam, I don't think I would have gotten over it so easily. 
As soon as Strawberry season hit I found the first available moment to grab my 3 year old daughter and head to the fields. In what must have been the hottest hour of the summer yet, we picked 15 pounds of gorgeous strawberries. Heading home with stained fingers and full bellies I placed the huge mound of berries on the counter where they sat, waiting to be cleaned. It wasn't until late that night that I managed to make space for some of the strawberries in the fridge, and two days later that I found time to trim them and start making some jam.

Usually making jam, (which I have done only a few times, and never with strawberries) would be a well thought out process with plenty of time and preparation. In my busy life, this was far from the case. I was making dinner for my family after a busy work day and noticed a few of my precious berries starting to rot. I dropped my parental responsibilities and started slicing berries into a pot, the pile of red juice stained strawberry leaves growing next to my forgotten plans for dinner. Needless to say my kids were hungry and fussy, and it was a long long night, but in the end, worth the effort! Thank goodness I had done some preparation; finding a no pectin strawberry jam recipe on line the night before, and purchasing some jam jars for canning from the grocery store.
 
The thing that makes jam or preserves thick is pectin. Some fruits like apples, lemons or raspberries contain it naturally, some fruits you need to add pectin either by mixing them with a pectin rich fruit or by purchasing pectin, (some is natural, some is manufactured and has preservatives, so read the labels). Some pectin can make jams cloudy, and if you use too much it can make your jam turn to jello. I didn't have any pectin, and I liked the idea of trying to make the jam without adding something out of a box. A google search resulted in a great recipe that used green strawberries as source of pectin, YES! The recipe also utilized a technique that I had developed for making strawberry ripple ice cream. To keep the fresh taste of the fruit, and not turn the gorgeous red berries into a light pink murky mush, you macerate the strawberries by tossing with sugar and mashing them, releasing their juices, then strain the juice from the pulp. 
The strawberry juice is boiled with sugar (I cut the amount by more than half and it still worked!) until it reduces down and the sugar reaches a high temperature and thickens. 
The fruit pulp is added in at the last minute and brought to a boil and then turned off, so it tastes fresh and maintains a deep red color, more reminiscent of raspberries than strawberries. A handful of green strawberries worked as the pectin, and since I wasn't certain of their thickening power, I added the pectin rich white pith and seeds cut from a lemon, wrapped in cheese cloth (a trick I learned from making meyer lemon jam in the winter). As the finishing touch I added fresh herbs: lemon verbena to two jars and thyme to one. Both herbs proved to be exceptionally delicious, and a spoonful of this jam on my morning slice of toast or on top of a bowl of yogurt is an incredibly wonderful tiny gift, and worth all of the effort and late night mess the project demanded!

The Best Strawberry Jam - No Pectin 
Adapted from Cincinnati Locavore Yield: approximately 1 quart or 4- 8oz jars of preserves

2 quarts strawberries, a few slightly unripe and green ones, slightly mashed
2 to 2 1/2 cups Sugar (about 
1/2cup to 2/3cup per cup of mashed berries)*
Seeds and white pith from 1 large lemon or 2 small lemons (you can add some lemon juice too if you like the flavor)
Thyme or Lemon Verbena - 4 sprigs (optional)

  1. Fill canning kettle with water to cover 1/2-pint jars by 2 inches, cover, bring to a boil, and keep it there.  Set 1/2 pint (8-oz) jars and lids into a pan of hot water over lowest heat. Alternately you can wash, dry and bake the jars at 225 degrees fahrenheit for 20 minutes. 
  2. Wash and hull strawberries. Mash berries by hand or with a stick blender. Strain  juice into a big heavy bottomed pot, reserve pulp. Add sugar to juice in the pot.
  3. Wrap lemon seeds and pitch in a piece of cheese cloth or a thin piece of un-dyed  fabric, tie with a string and add to the pot. 
  4. Bring juice, sugar and cloth bundle to a rolling boil, stirring occasionally. Reduce heat slightly and continue to cook juice at a low boil until it reaches 220 on a thermometer or when a drop put on a cold plate (put one in the freezer) has a bit of a jelly texture, so you know it has thickened.  
  5. Add reserved pulp and herbs if you are using them. bring to a low boil for 2 minutes. Pour into sterilized jars if you are canning them for storage, or into clean jars if you are just putting it in your fridge to consume in the near future!
If you are canning the jam:
Fill jars leaving 1/2" headroom. Wipe jar rims with damp cloth, cover with hot lids and screw on lid rims without tightening. (The lid rims are only there to hold the lids in place during processing; tightening them can both interfere with processing and cause you to dislodge the lids when removing the lid rims before storing your preserves.) Set jars into canning rack and drop into boiling water in kettle. Cover kettle and process 10 minutes, remove from water, and set on rack to cool. Once cool, check seals (press gently in the center of the lid -- if you feel a slight pop and the center flexes down and then back up again, the lid didn't form a seal and that jar should be refrigerated and used within three months).

*Most jam recipes suggest using 1 cup sugar per cup of mashed berries. The sugar helps to thicken the jam, but to me, it's way too much sugar, so I cut it in half, and it still worked and was delicious!

I picked my berries at Jones Family Farm (the green ones were from my tiny patch in the backyard)  To find a pick-your-own spot near you check out: pickyourown.org or in CT search Buy CT Grown. 


What do you do with your Strawberries? 

Friday, July 1, 2011

Garlic Lime Skewers and Shrimp Tacos

Recently, any food on a skewer seems to be quite appealing. Summer is taking root: carnivals are popping up on the weekends and the smell of (other people's) backyard BBQs are wafting down the street, flavoring my imagination with ideas of flavorful kebabs. Inspired, more than one dinner this week featured deliciously marinated food pierced by a very pointy stick and seared in my cast iron skillet until it was well charred and the garlicy aromas made my mouth water. This is an easy and quick recipe, aside from the few minutes it takes to skewer the food. The first night I used this marinade on thinly sliced chicken, skewered and  served with rice and vegetables, but it got devoured before any photos could be snapped. You can make this dish with any assortment of vegetables or meat you like, and, if you are lucky enough to have a grill, this would be even tastier cooked with the flame and smoke of an open fire!


On the second night of skewering, the same marinade of garlic, lime, cilantro, marjoram, thyme, oil, salt, pepper, and a drizzle of agave made the perfect base for very flavorful shrimp tacos. I also skewered and marinated some tofu for the vegetarians. Corn Tortillas were heated on the open flame of the gas stove, fresh lettuce was picked from the garden, and a yogurt and cilantro cream with a handful of fresh corn kernels made a delicious dressing. Very simple, very quick and incredibly satisfying!

 Cilantro Yogurt Cream
 Shrimp taco with a little extra fresh corn

Garlic Lime Marinade
for shrimp, chicken, tofu or beef

One pound of small shrimp or other meat:

4 Cloves garlic, peeled finely chopped
1 Lime, zested and juiced
3 Tablespoons cilantro, chopped (about 1/4 of a bunch)
6 Sprigs combined of other herbs you have or like (I used marjoram and thyme. Basil, oregano, taragon, sage, or others would also taste good.)
1/4 Cup oil
Salt and pepper to taste
Drizzle of honey, agave or a pinch of sugar
you can add dried or fresh hot pepper to this if you like
  1. Finely chop the garlic, salt, and herbs together or grind with a mortar and pestle or in a blender. Add oil, lime juice and zest, sweetener and pepper. 
  2. Clean and cut your meat or vegetables. For shrimp or fish: rinse in cold water, add a pinch of salt and the juice of half a lime; let sit for 10 minutes, drain, marinate and skewer. Chicken or beef: cut meat in very thin strips, marinate, and thread the skewer back and forth through the meat for easy quick cooking. For tofu: use extra firm, and cut into thick slices to withstand skewering. I marinated my shrimp and chicken for only 20 minutes, but you can marinate them for much longer, even over night if you have the time. 
  3. To cook: In a very hot heavy frying pan, drizzle a small amount of oil, and place enough skewers to fit with room around them. Do not crowd them or they will steam and not sear. Cook on high heat until one side is browned, flip over and cook for a minute or so on the other side until cooked through. Repeat until all the skewers are cooked.
To Make Shrimp Tacos:
Shrimp Skewers (above)
Corn tortillas - warmed (over an open flame if possible)
Cilantro Cream (below)
Lettuce - whole leaves or finely sliced
Fresh corn kernels - cut for 2 ears of corn (you can use frozen if needed)

Cilantro Cream
1/2 cup yogurt
handful of cilantro, finely chopped
pinch salt
pinch pepper
1/2 garlic clove minced (optional)
1/2 cup Fresh corn kernels (optional)

1. Stir all the ingredients together. Serve or refrigerate for up to 4 days.

Serve all the taco fixings in bowls on the table, and add any others that you are inspired to include: hot peppers, peaches, cucumbers or anything else that sounds good to you. Let everyone dig in and make their own tacos, it is a fun and delicious meal.

What do you like to skewer? (And I am intending this question to mean food!)