Showing posts with label roasting. Show all posts

Saturday, September 14, 2013

Roasted Tomato Sauce

September brings the start of school, lots of Jewish Holidays and not enough time to deal with all the tomatoes in my backyard. My quick and easy solution is this roasted tomato sauce. It can be done in a frying pan or a big roasting pan, depending on how many tomatoes you have. If you have a few extra minutes you can take the time to sauté the onion and garlic first, if not, just chop it up, toss it with an assortment of tomatoes (whole or cut), some olive oil, salt, pepper and some fresh basil, or other herbs like marjoram, oregano or thyme, and pack the whole thing into the oven at about 425 degrees. If you are in a real rush to get dinner on the table, do a quick sauté of all the ingredients on the stove top and then stick it under the broiler. Stir occasionally so the tomatoes don't burn, and in a few minutes, you have sauce. Enjoy it as is, tossed over pasta, in rice, greens, meat or beans or puree it a bit for a more traditional tomato sauce. If you happen to have an over grown zucchini lurking in the backyard too, split it open, remove the seeds, and dice it up for sauce.  
Frying pan version: I sautéd the ingredients before sticking them under the broiler.

Roasting pan version: I split the larger tomatoes, tossed all the raw ingredients with olive oil, salt and pepper and put the whole pan in a 425 degree oven. Siting occasionally until the tomatoes were very soft with lightly browned edges, about 45 minutes. 


The sauce is great with the roasted whole tomatoes as is (in the photo at the top), or give it a quick puree in a blender or with a stick blender, and enjoy.


If you want to grow tomatoes next year, all you need is a sunny spot, a big bucket, some good dirt and a little $3 plant (try a sun gold orange cherry tomato, it's especially prolific).  If you are fortunate enough to have lots of tomatoes to work with, what do you do with them? 

Monday, March 4, 2013

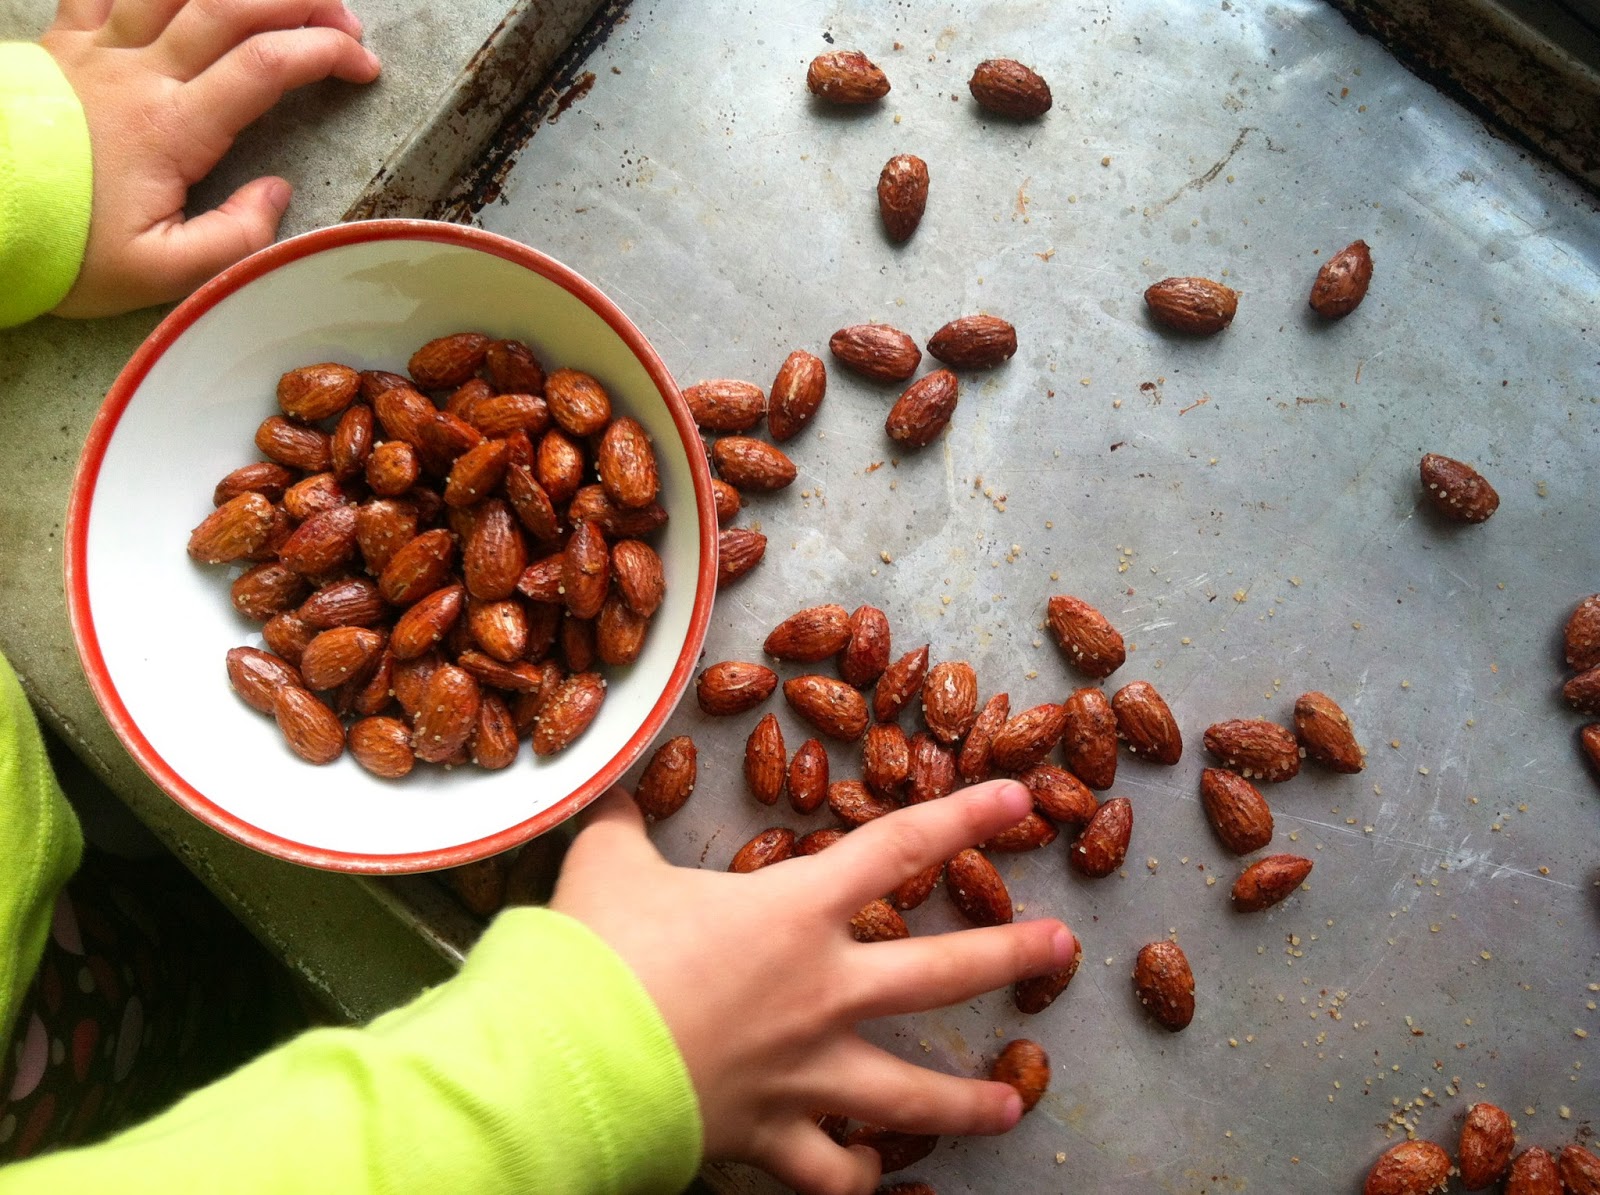
Orange Pepper Almonds

Candied nuts have got to be one of the most addictive foods around. Crunchy, a little sweet, a little salty and a peppery kick for fun. These are unbelievably simple to make and take 15 minutes start to finish (including the cooking time). They knock a salad up from standard fare to fabulous meal or make for a great snack when friends are stopping by (which is what inspired them this weekend). You can use any kind of nut you like. Starting with raw nuts (not roasted) is best so they aren't being cooked twice. I love the combination of orange zest, honey, salt and pepper, but really you can use any syrupy sweetener you like and any spices: curry, corriander and cumin, cocoa and chipotle or ancho chili, cinnamon and nutmeg etc... have fun with this...the cooking part, and the munching part. 
Orange Pepper Almonds
2 cups raw almonds (you can substitute any nut you like, walnuts are great too!)
1 tablespoon honey (basically a thin drizzle, just enough to very lightly coat each nut)
zest of one small orange
salt and black pepper to taste
1 tablespoon of raw sugar (optional)

  1. Preheat oven to 350 degrees. Line a baking sheet with parchment, foil or a silpat. 
  2. Toss almonds in honey until well coated all over. There should be a thin layer of honey on each nut, but they should not be dripping with honey or it will ooze and burn in the oven. Toss in the orange zest and season to taste with salt and pepper or any other spices you like. 
  3. Spread onto prepared baking sheet in a single layer and bake for 9-12 minutes until honey is bubbling on the edges of each nut and they are lightly browned, but not dark. If you want to use the raw sugar, pull the nuts from the oven at 7 minutes and sprinkle on a little raw sugar and continue baking until done. Cool completely, enjoy. Store in an air tight container (if you can keep them around). 
Here is a savory twist I sometimes make: just sauté almonds in a touch of butter with salt and pepper or any savory spices you like, and add to curry stir fried rice. A little more protein and crunch for a delicious meal.


What does this inspire you to make?

Sunday, January 20, 2013

Sweet Potato Fries

I love sweet potatoes, they're like nature candy. I remember in high school bringing baked sweet potatoes to school for lunch (split with a little butter and a pinch of salt). I'm sure I got funny looks from other kids...but that was a normal occurrence anyway. Roasting sweet potatoes is simple and very delicious. We often call these "fries" even though they are baked not fried. All you do is slice sweet potatoes (skin on) into wedges or any other shape you like. Toss them with a little oil, salt and pepper, spread them onto a lined baking sheet or roasting pan and roast at 450 degrees until lightly brown. About 45 minutes for large wedges, shorter if you cut them smaller.  Sweet potato fries are a great addition to any meal, but good luck getting them to the table, this pan was eaten before we even started dinner.

This recipe is also in the New Haven Cooks Cookbook, available at CitySeed (my employer). The recipe was submitted by the Fair Haven Community Health Center, where they teach this recipe as part of the nutrition counseling and cooking classes in their WIC office.

Sweet Potato Fries
Four servings


2 pounds sweet potatoes            
3 tablespoons oil, safflower, canola or olive            
Salt            
Pepper           
  1. Scrub sweet potatoes and dry.  Cut into long wedges, place in a large bowl and toss with oil, salt and pepper.
  2. Lay potatoes in a single layer on a foil or parchment paper lined baking sheet.
  3. Bake in a 400 degree oven for 40-50 minutes, or until golden brown and cooked through.  Check half way through and rotate if necessary.

Note: Try roasting other vegetables this way as well: carrots, parsnips, pumpkin, onion and even apple or pear, can be tossed with oil, salt and pepper and placed in a glass baking dish or lined baking sheet to roast. You can add herbs and spices as well. 


Have you been roasting anything interesting this winter? Please share....

Wednesday, January 2, 2013

Short Ribs: Happy New Year & Happy Braising!

Short Ribs seared until dark brown, waiting to be slow cooked in tomato and citrus.

Picture this: me as a young chef, a vegetarian no less, the counter of a catering company in Boston spread before me with more than a dozen racks of lamb. I had marinated them the day before, and proceed to sear them off, a rack at a time in large skillets. Week after week I marinated, seared and roasted these racks of lamb and then watched people swoon over them at parties. Eventually, I broke down and tried one, and I have loved lamb (and meat) ever since. I could rarely afford to by racks of lamb, so I moved on to discover  braised lamb shanks, and years later beef short ribs.*

When the weather turns cold, I look for any excuse to turn the oven on for a prolonged period of time. I crave slow braised dishes with rich warm flavors, and want to eat more meat than in the warmer months. Lamb shanks, short ribs or inexpensive cuts of stew meat are top of the list. And while we are not big meat eaters in my house, everyone appreciates these slow cooked cuts that become tender and succulent, glazed with the well reduced sauce they are cooked in.

One important technique in cooking many cuts of meat is to properly sear it, giving it a nice browned exterior. For meat that is roasted in the oven or cooked in a frying pan this searing seals in the juices. For meat that is going to be slow cooked it also adds flavor to the sauce.


The keys to searing meat well are:
1. Have the meat closer to room     temperature than cold, 
2. Make sure the cut is dry (pat it with a towel).
3. Be sure that your pan is very hot. 4. Place the meat in the hot frying pan and don't move it until it starts to brown up the side and releases easily from the pan when touched. 

Flip, repeat and you are done. For short ribs you season and sear each rib and then place them in a pot of sauce in the oven or slow cooker for many hours, until the sauce is reduced, the ribs are tender and almost falling apart. For this recipe I cooked them in a tomato based sauce with rosemary, thyme, lemon and orange zest, and plenty of onion and garlic. Another wonderful version is a soy sauce base with star anise and rice wine vinegar.

The Ribs in the tomato and onion mixture below is pre-braising. Unfortunately, this meal got devoured before I had a chance to snap a pic of the final dish...my sincerest apologies.  I guess you'll just have to give it a try and see this one for yourself.


Beef Short Ribs with Tomato, Citrus and Rosemary

6 Beef Short Ribs, (bone in)
2 large onions, sliced
6 cloves garlic, minced or sliced
1 large can diced or pureed tomatoes
3 slices of lemon peel (no white pith)
3 slices of orange peel (no white pith)
2 sprigs rosemary
3 sprigs thyme 
Salt & pepper
Enough water, stock or wine to just cover meat.

  1. Preheat oven to 350. Pat meat dry. Season with salt and pepper. Heat a heavy bottomed frying pan until it is very hot on the stove top. Add a small amount of oil such as sunflower or canola and place the meat in the pan. Cook until the meat starts to brown and releases easily from the pan when touched, about 5 minutes. Sear on all sides until meat is well browned, but not burned. Remove from pan set on a plate or pan to rest. 
  2. Remove any burned bits from the pan. Add sliced onions, and a touch of olive oil. Saute until tender. Add garlic cook until fragrant. Add tomatoes and liquid, lemon and orange peel, rosemary and thyme stir. 
  3. Return short ribs to the pot, nestling them into the sauce. Add a cup or two of water, stock or wine to the mixture to cover or nearly cover the meat. Bring the pot to a simmer on the stove top. Cover and place in the preheated oven to cook until the meat is tender and falling from the bone, at least 1.5 hours, but up to 3 hours. Check once or twice to see how much liquid has evaporated.
Note: you can add carrots, potatoes or other vegetables to this dish as well. For the soy sauce version, you'll have to experiment or search online for measurements, but I made a delicious version a while back with soy sauce, rice vinegar, star anise, brown sugar, water, garlic and onions....wish I'd written that one down.....

Happy New Year, and Happy Braising!

* As you may have heard me say before, when I eat meat, I try and buy sustainably raised meat, so I know the animal wasn't raised in horrible conditions on a feed lot. Some grocery stores have sustainably raised meat, as do many farmers markets. I have come to value meat as an investment for my family. We don't have a lot of money these days, but good food is something I value (incase you hadn't figured that out), so I buy inexpensive cuts of meat at the farmers' market (CitySeed is my local market) or at local stores and freeze them for once or twice a week treats. Beans, eggs, nuts and yogurt make up much of the rest of our protein source. 

Tuesday, November 20, 2012

Delicata - The Best Winter Squash

Aside from being absolutely delicious, my favorite winter squash (the delicata variety, pictured on the left above) stand out among all winter varieties because you do not have to peel them! The skin of a delicata squash is so thin it is edible, making preparation of it very easy. I thinly slice these, tossed with olive oil, salt and pepper and roast them. The roasted squash can be added to anything you like! One of my favorite combinations is a green salad with roasted delicata squash, quick pickled red onions, toasted nuts (walnuts, peanuts or pumpkin seeds) and a curry vinaigrette.

Delicata squash are available at most farmers' markets right now, and in some local grocery stores.

Roasted Delicata Squash
2 baking sheets

3 delicata squash - cut in half lengthwise, seeds removed
3 tablespoons olive oil
salt and pepper to taste
you can also add spices such as curry, chili pepper, or cumin

Preheat oven to 425 degrees
  1. Slice squash into 1/4inch thick half circle slices
  2. Toss with olive oil until evenly coated
  3. Toss with salt and pepper to taste, adding other spices if desired
  4. Place in an even layer on a foil or parchment lined baking sheet.
  5. Roast in the oven until lightly browned, about 40 minutes. Rotate part way through and checking for browning on the bottom side. 


Salad with Roasted Delicata Squash, Pickled Red Onions and Peanuts
If you want to try out this salad:

(in this recipe use red onions, they will turn a gorgeous pink color and omit the basil)

2. Make a basic Vinaigrette and add some curry powder and a drizzle of honey

3. Wash and dry some delicious salad greens: a variety of lettuces, dandelion or mustard greens.

4. Toast nuts or pumpkin seeds in the oven or in a frying pan until fragrant. 

5. Toss the greens with dressing and pickled onions. Top with roasted squash and nuts, enjoy!


While you have the oven on, you might as well go ahead and roast an acorn squash (shown above, split, seeded and placed face down on a baking sheet with 1/2 cup of water. Or, roast some sweet potato wedges or anything else you have in the fridge, make the most of having the oven on and get a jump on your next meal. 

What do you like to roast?

Thanksgiving Food Musings and a Beautiful Bird

I have been hosting Thanksgiving for the past few years, which means that I have been in charge of the Turkey. Each year I have tried a different type of bird, and a few different cooking techniques, but for the last two years, I used the same technique and ended up with a deliciously moist bird cooked in only 2 hours. Two tricks that I think made all the difference: slather tons of garlic pureed with butter or oil and herbs under the skin and on top of the skin, and start with a high heat to brown the bird (in the bottom part of the oven, and then turn the temperature down a bit to cook the rest of the bird, draping the breast with foil if it is getting too dark before the rest of the turkey is done. For the last two years, my turkey has cooked in half the time I had calculated based on it's weigh, and I've had to scramble to get the rest of the meal on the table before the bird was cold. I write this in hopes that I will remember for this year!

I never posted my pictures from last year, so I thought this might be a good time to share. It was a fairly traditional year as far as side dishes and seasoning goes. I'm including links to some good recipes on my blog and in other locations:

Garlic and Herb Roasted Turkey (below)
Mashed Potatoes*
Buttermilk Biscuits
Kale Salad
Roasted Squash and Brussel Sprouts with Pecans
Caraway Roasted Rainbow Carrots (harvested that morning from my own garden!!)

I went a little nuts on dessert:
Raspberry Pie
Cardamom Buttermilk Pie (I topped mine with whipped cream just before serving)
Coconut Cream Pie
Apple Pear Pie
Pumpkin Pie (using a fresh pumpkin)

*Note on Mashed Potatoes: this linked recipe is a basic starting point. I would add a total of 4 tablespoons of butter and I boil my potatoes in the skin and peel them hot using a dish towel, then place them directly in the mixer or ricer, adding salt, hot mik and butter until they are fluffy. 1 

Perfect Roasted Turkey
1 Turkey (about 15-18 pounds)- at room temperature
1 stick butter or 1/4 cup olive oil
8 cloves garlic
1 small onion
salt and pepper
herbs or spices of your choosing

  1. Preheat oven to 450 degrees.
  2. Puree garlic, onion, salt and pepper with butter or olive oil.
  3. Loosen the skin on the turkey with your hands or a spoon.
  4. Smear garlic puree under the skin, reserving a few tablespoons to rub on the outside of the turkey skin.
  5. Tie turkey legs together with twin or string
  6. Place turkey in a large roasting pan breast side up and place in the oven on the bottom rack. 
  7. Roast at 450 until the skin is nicely browned, roughly 45 minutes to 1 hour. Turn oven down to 350 and continue roasting until turkey meat reaches 170 degrees when tested with a thermometer, approximately 1 more hour. 


This year I am thinking of going a little lighter all around. Contemplating poached pears and fruit based desserts rather than so many pies (the picture above is missing a few pies form our meal last year), and a lot of vegetables again....we'll see if people let me skip the biscuits or not....

I came across this paragraph I wrote last year about the joys of growing and eating my own food. It was an incredible experience to have a large harvest of one crop from my tiny backyard garden and get to share it with my family.


"Growing food in my backyard is an absolutely thrilling experience. To think that I put these tiny little seeds in dirt, let the sun shine on them, give them a little water, and try to keep the squirrels, stray cats and children from destroying them, and a few weeks or months later I have food. Such was the case with 2 raised beds of carrots. Now, carrots take a heck of a long time to grow (70-90 days), so it is amazing to me that they are so inexpensive in the grocery store. This crop took up two halves of raised beds; some precious garden real estate. The great thing is that I planted them so long ago that I'd almost forgotten about them. I'd been saving them for our Thanksgiving meal, and almost forgot to pick them. I sent the kids out on Thanksgiving morning to pull some of the carrots we'd been eyeing for months. The next 30 minutes was filled with kids racing in and out of the house showing us the fat danvers orange carrots, and the assortment of rainbow carrots, skinny white ones, stumpy purples, golden yellows and oranges. The kitchen floor was covered in dirt and brown leaves, the picnic table outside was piled high with carrots (greens and all), and I was filled with an inexplicable joy, both that my kids were taking such pleasure in a vegetable, and that I actually managed to grow something so beautiful and delicious. There was no need to remind myself to be thankful on this Thanksgiving."

 Any Favorite Thanksgiving Recipes you want to share?

Sunday, July 1, 2012

Blistered Smoked Potatoes

I finally got a grill.
Six years ago I got a backyard, but it took me a little while to fill in this important component: a place to cook over a fire.  My family opted for a basic fire pit with a grill top, which means we have to build a pretty big fire to cook over, but lucky for us there is a big pile of logs and tree cuttings in a pile next door, that need to be burned, so our food is getting flavored with real wood smoke, and it tastes a lot better than charcoal!
 One of my favorite grill top treats has been smokey roasted potatoes. I steam the potatoes in the kitchen while I'm making a marinade or salad, then heat my large cast iron skillet over the fire and toss the tender potatoes in with some olive oil, salt and pepper and herbs. The skins blister and brown, and the wood smoke infuses the whole potato. It really doesn't get much better than this. 


Blistered Smoked Potatoes
2 pounds small potatoes (fingerling, yukon golds or red new potatoes work well)
2 tablespoons olive oil
salt and pepper to taste
handful of fresh herbs such as marjoram, thyme, rosemary, etc...
  1. Steam whole potatoes in a pot on the stove. Remove from pot when tender.
  2. Heat a heavy bottomed skillet with a heat proof handle over a wood fire.
  3. Add olive oil to pan and quickly toss in hot tender potatoes and season with salt and pepper.
  4. Turn potatoes occasionally so that they brown on all sides.
  5. When potatoes are nicely browned, add fresh herbs, toss and serve.
For the rest of the meal I usually add an assortment of grilled vegetables, and some marinated meat or tofu. For this meal we had chicken thighs using a garlicky marinade similar to the one in this recipe, and tofu with the same salty, sour, sweet marinade. 
The joy of building a fire, cooking over it, and watching the coals burn together with my family and friends has brought me incredible joy and made me thankful for all the simple blessings I have. Life can be very challenging at times, but sometimes it's the tiny moments of joy that help me to have perspective and give thanks. I know it seems corny to get all deep and mushy over a backyard BBQ, but  I hope all of you are blessed with more than a few moments of happiness and thanks for good food, family and community this summer.

Are you grilling this summer? Please Share your recipes, thoughts etc....

Monday, September 26, 2011

Feast from the Fields 2011

What an amazing night. Last weekend I cooked for a fund raising dinner for 250 people at an urban charter high school with an organic farm. Most of the ingredients traveled only a few feet to arrive in the kitchen including the pig, the chicken, and nearly all of the vegetables. The honey, peaches and cheese were from other nearby farms, and only the oil, butter, flour, sugar, pasta and spices were purchased from afar. 
Another local chef, myself, and many students, teachers and kitchen staff from Common Ground High School cooked and served up this fabulous dinner. A wonderful accomplishment, a great learning experience for the students, and a real gift to the community in so many ways. The meal, the silent auction and live auction raised $40,000 for the school.

Unfortunately I do not posses the skill to cook, coordinate a meal like this AND photograph it, so the true essence of the night: enthusiastic, capable teenagers representing the diversity of our little city, cooking, cleaning, working, learning, serving, eating, and growing was not captured in photos. Jason Sobosinski from Caseus restaurant and "The Big Cheese" Food Network Show and I planned and cooked the meal. It was a fun mash-up of our two styles, and in the end it worked wonderfully. The unbelievably hard working coordinator of the event, Joel Tolman is a colleague and friend of mine: thoughtful, smart, collaborative, and an incredible force. Shannon, the new farmer for the school is working wonders with the land and supplied us with an abundance of food: cucumbers, beets, red onions, winter squash, salad greens, kale, chard, herbs, garlic, a 165 pound pig, and more than a dozen chickens.  And a big thank you goes out to Rhonda, Thea and Theresa, the Common Ground Cooks and all the students who helped to prep hundreds of pounds of produce from the farm and wash lots and lots of dishes!!!
 
Here are some snippets of the food from the night:
 
Menu
Cider Brined Slow Roasted Whole Pig
Poblano Pepper Apple Sauce

Buttermilk-Marinated Common Ground Fried Chicken
Fresh Thyme and Lemon Zest   

Mac and Beaverbrook Farms Cow & Sheep Cheese

Garlic Braised Common Ground Kales & Chards 

Common Ground Quick Pickle Red Onion &          Cucumber Salad with Basil and Tarragon

Common Ground Arugula and Mixed Greens, Roasted Delicata and Candy Roaster Squash & Shredded Beets
Roasted Scallion and Ground Pepita dressing
Beltane Farms Chevre

Warm Honey Bourbon Peach Short Cake & Homemade Creme Fraiche
Our fabulous student waitstaff for the night
 
 Scallions for the salad dressing roasting on the hot coals of the pig roasting box
 

Pickled red onions with tarragon and basil, waiting to be tossed with the cucumbers
 

The pig named "milkbottle" being brined and seasoned to go into the cook box. The students raised this pig, and many stopped by to say "hi" to it, or were fascinated to see how it would be cooked. A few students were sad, which is very understandable, but most were very interested in the process and they all knew he was being raised for food. I had the experience of raising and slaughtering a chicken once when I was a teen, and it gave me a life long appreciation and consciousness about animal rearing and the sources of meat in our country. I now only eat meat that is sustainably raised (which is more expensive and harder to find, so I eat a lot less meat than the average person).

 Thea and Jason cooking fried chicken, also raised on the farm. 
As you can see, they kept things lively in the kitchen!

I was very happy with how the salad turned out. The roasted scallions added a smoky depth to the dressing, and the ground pumpkin seeds gave it a nutty sweetness. The greens, a mix grown on the farm, had been harvested the day before, and it was topped with roasted delicata and candy roaster squashes, which can both be cooked without peeling them, which makes the prep time much quicker, and helps hold the squash together for a dish like this. To add some brightness to the dish, the beets were shredded raw using a fine shredding attachment to the food processor, and some delicious fresh chevre (goat cheese) from Beltane Farms rounded out the dish nicely.
 

Jason, as a master of all things cheese, made Mac and Cheese using a wonderful assortment of cheeses from Sankows-Beaverbrook Farm.

For dessert we wanted to use an end of summer fruit rather than the usual apples and pears of fall. The white and yellow peaches were the final harvest from near-by Drazen Orchards, a great family run orchard where they practice IPM - integrated pest management to greatly minimize the amount of pesticides and fungicides used. The peaches had to be harvested a few weeks before the dinner, and wouldn't have lasted in the fridge, so a group of students sliced and froze them on sheet pans (no need to peel them!), then transfered them to a large bag. Since they had been frozen we needed to cook them for dessert, so the were roasted with a local honey, bourbon and vanilla bean sauce.
  
The shortcakes came out great, thanks to the fabulous recipe from Caludia Flemming's 
incredible cookbook "The Last Course".

 The completed dessert: Warm Honey Bourbon Peach Shortcake with Homemade Creme Fraiche.

Creme Fraiche, a french style sour cream, is very easy to make at home, rather than buying an expensive container from the store. 
2 Tablespoons of cultured butter milk or yogurt
2 cups of heavy cream (pasteurized is better than ultrapasteurized)
  1. Mix the ingredients together well. Cover with a towel and let sit out on the counter for 12 to 24 hours, until it is as thick as sour cream. It will keep in the refrigerator for up to 2 weeks. For dessert it can be served straight or sweetened and whipped.It can be used in savory dishes as you would use sour cream.
I will post recipes for the complete shortcake dessert, and the salad in the near future, 
so check back soon!
And, if you live anywhere near New Haven, CT go check out Common Ground School, there are lots of opportunities to visit during open farm days and festivals!

Wednesday, July 20, 2011

Mexican Roasted Corn

I have never lived in Mexico, much to my dismay, but I have lived in Brooklyn, where Mexican, and Latin American cooking is alive and well. My first taste of this fabulous culinary creation was 7 years ago at the food carts by the soccer fields in Red Hook, Brooklyn. I still remember watching the corn being roasted on an open flame, slathered with mayonnaise, sprinkled with grated cheese and chili pepper and served with a wedge of lime. The combination was, and is addictive, and I have not stopped dreaming of it since.

Roasting corn on a gas stove or grill is quick, easy and fun. No boiling required. Top it with whatever you like, salsa, pesto, butter and salt, but before you reject the idea of mayonnaise on corn, please try this just once, you will be happy you did. 

Mexican Roasted Corn
Fresh corn on the cob - shucked
Mayonnaise
Grated cheese - such as pecorino romano or parmesean, or from a latino grocery store.
Chili powder (optional)
Limes - cut into wedges
  1. Place corn cob over grill or gas stove flame. Cook until some of the kernels begin to blister and brown. Turn corn until all sides are roasted. 
  2. Spread a thin coating of mayonnaise over a corn cob, sprinkle with grated cheese, a dash of chili powder and finish or serve with a wedge of lime. Eat immediately!
If this post gets you excited about roasting corn and not having to set a large pot of water to boil in triple digit heat, then check back soon for a wonderful recipe for roasted corn and peach salad. 

Did you try roasting some corn? Let me know if you liked it!