Showing posts with label breakfast treats. Show all posts

Wednesday, February 24, 2016

Transformation and Life-Giving Food

It has been a heck of a year since I posted here on my beloved blog. It has been a time of transformation and trying hard to maintain balance.  Over the past year I helped both my dad and my step mother pass on to the realm of the ancestors. My grandmother, a 93 year old holocaust survivor had to be moved out of her home, and has gone through periods of reliving her traumatic past and trying to adjust to her new present. As a part of the New Haven Food Policy Council I spearheaded the effort to establish a Food System Director position for the City of New Haven, with the final phase of hiring coming in the next few weeks.  I stepped down from the Council after eight years, but am helping to establish this new position.  I finished building a teaching and business incubation kitchen at CitySeed, the non-profit I work for, with an enormous amount of community support. I assisted with the opening of the new Culinary Academy at ConnCAT.  I took a sabbatical from work last summer to revive my spirit and go waterfall hunting with my family.  I have taken a necessary step back from some of the time and emotionally intensive political and community organizing work I have been doing for all of my daughter's eight years of life. I joined the board of Soul Fire Farm an amazing family farm in NY, focused on dismantling oppression and healing through food, community and liberation. I started exercising again.  I smile more.  I stop by to stare at the ocean more. I don't email while I'm hanging out with my children any more.  I have more attention and love to give to my own heart and to my husband. Phew.....that's a lot!! While things are not always easy, and there is always more growing and learning to do, over all I have less stress.  I am happier. 


For all of this I am grateful. Spending a year helping my father die was sad, healing and also life-giving. I had to slow down and focus on what was important. I was already starting to do that, but his getting sick really affected me. Early morning walks/jogs were also healing for my body and spirit. I started to exercise without judgement or expectation, which meant that I did it more, and did it with joy. As part of healing my body I also started to cut out some of the sweets and bread that I gravitate towards when I'm stressed. I came across this incredible nut bread in the midst of all of this change, and it brought me joy. It was referred to as a "life changing loaf of bread" on the My New Roots site I found it on, and I would have to agree with that title. 

This "bread" has no flour in it, only nuts, seeds, psyllium husk & chia seeds for fiber and binding, oats, water, coconut oil or ghee, maple syrup and a little salt. You mix that all together, let it sit in a parchment lined bread pan overnight, bake part way in the pan, then turn out on the oven rack and finish baking. Thats it. I swapped out the sunflower seeds for pumpkin seeds, I favor them with hazelnuts, but any nut will do, and I only eat these bread slices well toasted and crisp on the edges.  

Here is the recipe with slight variations from the original. I hope that you enjoy this bread, and that you are enjoying your life more each day. 


"The Life-Changing Loaf of Bread"Makes 1 loaf

Adapted from www.mynewroots.org
note: this bread is officially gluten free if you make it with oats labeled "gluten free"
Ingredients:
1 cup pumpkin seeds
½ cup flax seeds
½ cup hazelnuts or almonds
1 ½ cups rolled oats
2 Tbsp. chia seeds
4 Tbsp. psyllium seed husks (3 Tbsp. if using psyllium husk powder)
1 tsp. fine grain sea salt (add ½ tsp. if using coarse salt)
1 Tbsp. maple syrup (for sugar-free diets, use a pinch of stevia)
3 Tbsp. melted coconut oil or ghee
1 ½ cups water
Directions:
1. Combine all dry ingredients, stirring well. Add maple syrup, oil and water to the dry ingredients and mix very well until everything is completely soaked and dough becomes very thick (if the dough is too thick to stir, add one or two teaspoons of water until the dough is manageable). 
2. Line a bread pan with parchment paper, foil or use a silicone pan. Pour all of the nut mixture into the pan and smooth out the top with the back of a spoon. Let sit out on the counter for at least 2 hours, or all day or overnight. To ensure the dough is ready, it should retain its shape even when you pull the sides of the loaf pan away from it it.
3. Preheat oven to 350°F / 175°C.
4. Place loaf pan in the oven on the middle rack, and bake for 20 minutes. Remove bread from loaf pan, place it upside down directly on the rack and bake for another 40 minutes. Bread is done when it sounds hollow when tapped. Let cool completely before slicing (difficult, but important).
5. Store bread in a tightly sealed container for up to five days or in the fridge for up to two weeks. Freezes well too – slice before freezing for quick and easy toast!


What is bringing you joy these days?

Friday, January 16, 2015

Homemade Yogurt, Finally!

I have tried a few times to make homemade yogurt, but rather than jars of divine creamy yogurt, I ended up with soupy sour milk. It's an expensive experiment if it doesn't work right. Thanks to a conversation with my friend Leah of Soul Fire Farm this summer, I learned a new technique that is turning out perfect yogurt every time, (two quarts for the price of a half gallon of milk, much cheaper than store-bought, and no containers to recycle).  I often use Farmers Cow milk which is a local CT dairy cooperative of small farmers, or organic or milk from grass feed/pasture raised cows so it is hormone free. 

The key to this successful recipe is holding the yogurt mixture overnight in a cooler filled with extra bottles of hot water to keep the temperature warm enough for the good bacterias added to the milk to work their magic and turn into yogurt. Many traditional recipes say to wrap the warm milk mixed with starter in towels and keep in an oven with the light on, but even in summer, this was not warm enough in my house to make the yogurt thicken.  

Good yogurt is filled with probiotics which are naturally occurring good bacterias that help our bodies digest food and fight off germs and infections. My daughter recently had to take antibiotics for Pneumonia, and we have been making sure that she eats or drinks yogurt, sometimes with extra probiotics mixed in, every day, to balance the effects of the medication which kills all bacteria in your body both good and bad. Yogurt and other naturally fermented foods like sauerkraut or kimchi also contain probiotics which are great for your health. 

Hope you enjoy this and try out this simple recipe at home!

Homemade Yogurt
makes 2 quarts yogurt

1/2 gallon milk
1/4 to 1/2 cup plain yogurt
4 quart sized jars (or the equivalent)

Heat up a half gallon of 2% milk (you can use whole milk if you prefer) to 180° - measure this with a cooking thermometer. Remove from heat and let cool to 110°. 

While the milk is cooling, boil a big pot of water and place your jars and lids in it to sterilize by boiling for 10 minutes or so. Prepare a cooler by lining it with dish towels. Fill two of your jars with the boiling water from your sterilizing pot, screw the tops on the hot water jars and place them in the cooler. This is going to keep the cooler warm while your yogurt develops. 

When the milk has cooled to 110° stir the plain yogurt into the milk thoroughly. Pour into two sterilized quart-size mason jars, screw the covers on, and place in ithe towel lined nsulated cooler with the jars of hot water. Wrap the towel over all the jars and close the cooler tightly. Let sit for 8 to 12 hours.  Place set yogurt in the refrigerator to chill. Save a little of this yogurt as starter for your next batch. ENJOY!!!

Sorry the pictures are not laid out well, but they should give you an idea of the process! 

Please share your tips and techniques for homemade yogurt (or other treats) below!


Saturday, April 26, 2014

Gougéres


Before it gets too hot to turn on the oven, you might want to make these delicious treats....
Gougers are like huge savory cream puff pastries, crisp on the outside, custardy and eggy on the inside. They are made from a cooked pate choux dough which is one of those recipes french people think is difficult, but it is actually pretty simple, so don't be intimidated. This recipe does require a stand mixer, although if you are up for a workout, you could probably do it by hand.

Gourgéres are often made small, about 1 1/2 inches in diameter for an appetizer or snack, but I first came across these huge ones at Tartine Bakery in San Francisco in 2005. They were about 5 inches in diameter with crisp melted cheese adorning their tops. I went home, got the cookbook (as a gift from my wonderful mother in law) and made them, and they didn't disappoint. This batch I baked last summer and stuffed like a sandwich, inspired by an incredibly red tomato from my garden. I didn't have nearly enough cheese in the house to replicate the ones I saw at Tartine, but they were still delicious. I also made a tray of small puffs for us to munch on while we prepared lunch, as I knew we wouldn't be able to keep our hands off them.


Gourgéres with Gruyere & Thyme

Adapted from Tartine

Choux Pastry
1 1/4 c nonfat milk or water
10 tbsp unsalted butter
1 tsp salt
1 cup flour
5 large eggs
3/4 Cup Gruyère cheese, grated
1 tsp black pepper, freshly ground
1 tbsp fresh thyme, minced

Topping
1 large egg
pinch salt
grated Gruyère for sprinkling

Preheat oven to 350 degrees F. Butter a baking sheet or silpat.
  1. Combine, milk or water with butter and salt in a saucepan over medium heat. Wait for the butter to melt. Turn off heat. Add flour all at once. Stir, stir, stir. Lumpy mush will become a nice smooth ball after a minute or so of stirring.
  2. Transfer dough to a stand mixer. Add paddle attachment. Add egg one by one at medium speed. Make sure to incorporate egg before adding the next. After all the eggs have been added, mixture should be thick, smooth, and shiny.
  3. Add Gruyère, pepper and thyme by hand using a rubber spatula.
  4. Using a piping bag or a scoop make 3 inch rounds of batter on a lined baking sheet spacing them at least 2 inches apart as they will puff when they bake. To make small ones, pipe or scoop 1 inch rounds onto a separate pan as the cooking time is shorter. 
  5. To make topping, whisk 1 egg with pinch of salt and brush over each pastry. Lightly sprinkle each pastry with a little cheese.
  6. Place pastries in the oven immediately and bake until they are puffed and browned...around 35-45 minutes (25-30 minutes for small ones). As soon as you remove them from the over, poke each large pastry with a toothpick a few times to release some steam to avoid them collapsing. Serve warm if possible. Or let cool completely and place in an airtight container. Recrisp the puffs at 350 degrees for 5 minutes.

Tartine Bakery Website Here
This recipe is from the Tartine Cookbook #1 which is an all around wonderful book.
The third cookbook Tartine Bread was released not too long ago and also has some incredible recipes.

Saturday, March 22, 2014

Buttermilk Scones

This is definitely the messiest batch of scones that have ever come out of my oven, but truthfully, what does mess matter when they taste so good? Crisp sugared edges, buttery, slightly sweet interior with fragrant steam of anise and orange mixed into the batter. Scones are deceptively luxurious, as really, they are so easy to make. It's the same process as making biscuits, cutting cold butter into flour until it's broken into little pieces, adding liquid, mixing only enough to pull the dough together, cutting and baking. Once upon a time every mother, grandmother auntie and even a few uncles knew how to do this. It's a skill that has been replaced with refrigerated cardboard tubes barely containing the dough ready to burst from inside, filled with five times the number of ingredients needed, leaving the average shopper feeling there is some mystery to making a biscuit, something you can't just do at home. 

And so we are here. Like so many other culinary skills I savor, a totally basic recipe that once you make a few times, will vanquish the fear and open up a world of possibility, a food that's quick, versatile, and delicious; a gift you can whip up to treat your family and neighbors who have yet to walk behind the velvet curtain revealing the simplicity that is scones and biscuits. 

This scone recipe comes from a great cookbook from Julia Child that came out in the 90's when I was just entering the professional culinary world. It is among the early wave of photo rich cookbooks that helped to birth the realm of celebrity chefs and cookbooks of today, those books you want to pour over nearly as much as you want to eat the foods described within. Baking with Julia by Dorie Greenspan is a collection of recipes from great bakers across the country, and some of the base recipes, like these buttermilk scones are gems. My standby favorite additions are anise, lemon or orange zest and currants, but really you can add nearly any combination of flavors you like: citrus, dried or fresh fruits, ginger, spices or shredded coconut. You could even go savory by reducing the sugar to 1 tablespoon and adding cheese, olives or herbs. 

This batter is very wet, so flour your counter well before turning out the dough, handle the dough as little as possible, leaving the small chunks of butter to melt in the hot oven resulting in flaky pockets of rich steam and deliciousness. A simple pleasure you will now be able to enjoy more often.  


Above: unbaked scone, bits of butter layered within the dough are what make the final product so tender and flaky.


BUTTERMILK SCONES   

Recipe by Marion Cunningham 
from Baking with Julia by Dorie Greenspan (with my notes and adaptations)
3 cups all-purpose flour (part whole wheat, corn meal or oat flour is great too)
⅓ cup sugar (I use 1/2 cup)
2 ½ teaspoons baking powder
½ teaspoon baking soda
¾ teaspoon salt
1 ½ stick cold unsalted butter, cut into small pieces
1 cup (approximately) buttermilk*
1 tablespoon grated orange or lemon zest (optional)
½ stick unsalted butter, melted, for brushing (I generally use a few tablespoons of cream or 1/2 & 1/2)
¼ cup sugar, for dusting (I use turbinado sugar or  "Sugar In The Raw")


Other additions might include:
1 tablespoon anise seeds 
1/4 cup dried fruit like currants, raisins or shredded coconut
1/2 cup small or diced fresh fruits 
candied ginger, cinnamon, nutmeg or other spices

savory additions work to, just reduce sugar to 1 tablespoon and add things like cheese, fresh or dried herbs, olives, curry or other things you like. 
* If you don't have buttermilk, you can substitute 1 cup of any kind of milk with 1 tablespoon lemon juice or vinegar or 3/4 cup milk with 1/4 orange juice.
  1. Preheat oven to 425°, and position the racks into thirds in the oven.
  2. Mix flour, sugar, baking powder, baking soda, and salt in a medium size bowl. Add the cold butter and mix it with your hands until it resembles coarse cornmeal. You could also use a pastry cutter, but your hands are really the best option. (I use my electric mixer with the paddle attachment.) It's OK if there are a few bigger pieces of butter remaining because they add to the flakiness of the scones.
  3. Pour in the buttermilk and the zest and mix with a fork or rubber spatula until it is just combined. Do not be tempted to mix it until it looks pretty! The original recipe says to knead a few times, but I just scrape the dough onto a floured counter and gently pull it together. If it is too dry, you can add 1 tablespoon more milk. 
  4. Shape the dough into a long rectangle about 3 inches from front to back of counter, 1 inch high and about 18 inches left to right. Using a chefs knife or bench scraper, cut from front to back across the 3 inch length of the rectangle angling from right to left in a zig zag resulting in triangular scones.  
  5. Place the scones on a baking sheet, lined with parchment, brush them with melted butter or cream, and sprinkle with a little bit of coarse sugar. Bake for 10-12 minutes, until both the tops and bottoms are golden rotating in oven if necessary. Transfer to a wire rack and let cool slightly. 

For freezing: you can make these up until the point of cutting them into triangles. Freeze on a cookie sheet, then transfer to a air tight bag or container. To bake place scones on a baking sheet while oven is preheating. Bake following instructions above, but increasing baking time slightly (time will vary). 


Do you have a great scone or biscuit recipe? Please share!

Saturday, March 8, 2014

Brazilian Countryside Breakfast: Avocado, Oats & Molasses

 I know this looks and sounds crazy, but trust me it is delicious! Take 1/2 a ripe avocado, mash it with a fork and scoop it into a small bowl. Add 1/2 cup RAW rolled oats, drizzle with molasses. Mix molasses into oats and enjoy the molasses covered oats and the rich creamy avocado together in each bite. I first ate this in Brazil deep in the countryside of Bahia in 1994. Avocados are eaten primarily as a sweet food there, the whole left by the pit filled with condensed milk, or fresh molasses; or blended into milk shakes called "vitaminas". Do yourself a favor and try this combination for breakfast, it is a huge favorite in our house!


 Have you come across other fun and unusual breakfasts abroad?

Thursday, February 27, 2014

The Love of a Good Egg


More than a few of my best childhood food memories (of which there are many) involve eggs. A soft boiled egg broken over torn pieces of buttered toast, the yolk soaking into the buttery bread; my father making "Egyptian Eyes" essentially an egg in a hole, a triangle shaped hole reminiscent of the pyramid with the eye on a dollar bill; or the tiny fancy egg cups and little spoons my dutch grandmother had for us.

My love for eggs has risen and fallen over the years. These days it's by far on the up swing with my family eating two or three dozen a week. Yes really. Eggs are one of the least expensive types of protein, rivaled maybe by beans, but they are far more versatile and quick to cook, so eggs make it into many of our meals, breakfast, lunch or dinner.  A number of years ago I started reading about how egg laying hens are treated in factory farms an was totally disgusted, so now I mostly buy organic or certified humane eggs as well as eggs from small local farms when I can. Some of the grocery store eggs are from big farms like Pete & Gerry's in New Hampshire (the medium sized ones are usually much cheaper) and some are from local farmers at the CitySeed Farmers' Markets, or when I'm lucky from my mechanic's wife at Aquilla Motors Garage down the street....

Yes, homegrown eggs at our urban gas station, lovin' it!
While humanely raised eggs are more expensive than the bargain priced cousins, when I think about how many meals we can get out of a dozen costing $2,50 or even $4, and how the chickens were not feed animal byproducts and kept in tiny cages, well, it makes me actually want to eat them.

One of my favorite staple egg dishes is rice and beans with a fried egg on top. I love the richness the yolk adds to the dish. Similarly, if we make rice and stir fried or roasted vegetables for dinner, topping it with a fried egg and some good hot sauce transforms the dish and adds some much needed protein.

Another great stand by meal (for breakfast, lunch, or dinner) is an Omelette. Some chefs will wax poetic about the sill needed to cook the perfect Omelette. Don't worry about making it perfect, or if it browns a little (like mine did accidentally) just find some good eggs, and some delicious fillings, sautéed greens and cheese, scallions, fresh tomatoes, zucchini and thyme...whatever you have on hand and a pinch of salt and pepper...It's a quick, delicious, affordable and healthy meal. 
Making the perfect soft boiled eggs is also a bit tricky. I find that you have to test it out with a specific pot, burner size and amount of water, all of those factors influence how quickly the egg will go from soft to medium to hard. In general, I cook an egg for one minute at a simmer, and it is soft, but if I use a different pot, I may get a slightly uncooked egg or a medium cooked egg.

So here's to hoping that more folks start eating eggs for dinner. It's a great quick alternative on those nights when you might have been tempted to get take out or eat not so healthy packaged foods. 

If you are looking for a fun but slightly sweet breakfast or dessert with eggs, check out this puff cake with fruit.

Please share your favorite egg dishes!

Friday, February 14, 2014

Oatmeal Take Two: Caramelized Banana and Hazelnuts

There have been many cold mornings when the thought of oatmeal for breakfast reminded me of gruel or watery plain congee; bland and totally unappealing. Maybe it was the years of eating oatmeal and peanut butter for breakfast at 6am, before heading in to work at a restaurant, or to teach; a functional breakfast, filling, cheap, and easy.  I took a multiyear break from eating oatmeal as a regular breakfast item, which must have been a good decision, because suddenly it has reentered my life, reborn and deliciously adorned, like a grown-up fancy cousin, not the plain jane I once knew.  

The thing about this upgraded oatmeal is that it is still simple and delicious; the toppings really take so little time to prepare, but they make such a difference.  I generally add some chopped nuts or nut butter to my oatmeal to add protein, and if I have it, any kind of fruit so there is something fresh, and a natural, unrefined sweetness. I almost always add a sprinkle of cinnamon, which lends a bit of sweetness, and occasionally a little drizzle of honey or maple syrup.  The easiest toppings are things that don't have to be cooked, like strawberries, shredded unsweetened coconut, walnuts and honey, or diced apples, almonds and dates.  On a weekend morning I give it a little more time and sauté some bananas with butter and maple syrup, and caramelized some hazelnuts in the same mixture, making a sweet warm decadent addition to the bowl. When I'm in a rush and I need to save the few pieces of fruit in the house for my kid's lunch or snack, a handful of raisins, cooked up plump with the oats, a big spoonful of peanut butter on top, a drizzle of milk and honey make for one of my workday winter favorites. 

Caramelized Banana & Hazelnut Oatmeal
Serves 2
Prepare plain unsweetened oatmeal (recipe below)
Make toppings while oats are cooking

2 ripe bananas. peeled
1/2 cup hazelnuts (whole or chopped)
3 tablespoons maple syrup or honey (you can use less if you want)
2 tablespoons butter (or less if you want)
pinch salt
milk (any kind)
cinnamon or other spices optional

The Nuts: Generally I add a slice of butter (less than 1 tablespoon), a drizzle of maple syrup or honey (1 to 2 tablespoons) and a pinch of salt to a frying pan set over medium heat. Simmer until butter and syrup are mixed and let them bubble and start to caramelize, about 1 minute. Watch carefully so it doesn't burn. Add a handful of whole or chopped hazelnuts. Stir frequently cooking until nuts are well coated and starting to brown. Remove nuts into a bowl or plate and set aside.

The Bananas: Add one tablespoon of butter to the frying pan right after you remove the nuts, (no need to wash it out). Add 1 or 2 tablespoons of maple syrup on honey, a pinch of salt and any spices you like. While this is bubbling over medium heat, slice 2 peeled bananas in half across the middle and then along the length. Place them in the bubbling syrup and butter. Cook until browned slightly on one side, turn over and cook on other side. If the caramel starts to get too dark, you can add a few drops of water. The bananas will start to soften, so handle gently.

To Complete: spoon one serving of oatmeal into a bowl, top with caramelized bananas and nuts. Drizzle a little milk of your choosing (cow, almond, rice etc...) around the edge. Add a sprinkle of cinnamon if you like. Enjoy.


Basic Oatmeal - Serves 2
1 Cup Rolled Oats*
2 Cups Water (can use 1/2 milk or almond milk if a creamier oatmeal is desired)
pinch salt (optional)
  1. Combine oats and water in a pot. place over medium high heat, bring to a boil and reduce heat to simmer oats. Stirring occasionally. 
  2. Cook until oats are cooked through and soft. You can adjust water to make your oatmeal thinner or thicker, depending on how you like it. 
*If you have quick oats you can use the same ratio of oats to water, but they will cook much quicker. If using steel cut oats, you need 1 cup oats to 3 or 4 cups of water. Check out this recipe for how to cook them.

Really I think almost any fruit or nut is wonderful on oatmeal. Mango and strawberries are particularly delicious and beautiful...sadly we ate that bowl before any pictures could be snapped... Medjool dates, melted butter and almonds make for a deep rich version, perfect for these cold winter mornings.

What are your favorite oatmeal toppings?  Please share!

Tuesday, July 16, 2013

Cold Brew Iced Coffee


I love good coffee. Espresso especially, but good coffee with hints of chocolate and a smooth rich finish is like heaven to me. In the summer I keep a jar of iced coffee on hand for my morning (or sometimes afternoon coffee). Many coffee shops these days make cold brewed iced coffee, and I thought I'd finally try it at home. Cold brewed iced coffee, when done right has all the delicious rich flavor of coffee without the acidity, that's the appeal (also, you don't have to boil water in the 100 degree weather). I had seen some crazy contraptions for this brewing method, but a google search made me realized you don't need anything special to make it at home.  I found this excellent post from a chef at Cooks Illustrated, America's Test Kitchen. He seems to have tested the heck out of this recipe and includes great instructions and photos. I will summarize and simplify it here, but check out his post for more details: - photos and description   and: - recipe (I altered this a bit).

His recipe uses 1:1 coffee to water ratio. I'm sure this makes great coffee, but it is a bit too costly for my wallet, so I used less coffee, and still got a great result. I suggest you play with this recipe, trying different roasts of coffee (medium or dark) and different amounts of coffee. The variables I wouldn't change are: 
1. grind your coffee very fine (espresso or turkish coffee fine)
2. let it steep for 24 hours. It may look dark and ready to go, but it really won't have enough flavor until it steeps for the full 24.


Cold Brew Iced Coffee

2 cups (or up to 3 cups) finely ground coffee (medium roast is recommended)
4 cups room temperature water

  1. Stir coffee and water together in a french press or other jar. Let stand covered for 24 hours. Stirring once or twice, especially in the beginning.
  2. After 24 hours: If using a french press, press the solids to the bottom of the press. Pour the coffee through a paper filter set in a strainer (this will take a while). If you don't have a French press, pour the coffee through a strainer to remove large solids and then through a paper strainer to remove the fine grinds. 
This will result in a concentrated coffee which you can pour over ice and add a desired amount of water to get the richness you like and enjoy. (His recipe dilutes the coffee with an equal amount of water, pours over ice, and adds a pinch of salt.....I enjoyed mine with a bit of cream...)


If you are interested in some other fun summer drinks check out:


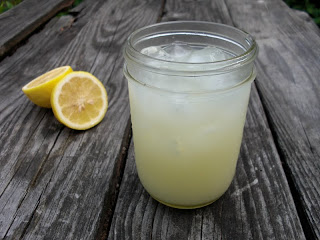
Farmers' Strawberry Lemonade (this has cream in it)


And then there are the spritzers....juice or fruit syrups with seltzer....I love summer drinks!

But, back to coffee. For you die-hard coffee heads out there, what are your cold brew techniques?

Saturday, February 2, 2013

Spice Roasted Apple with Honey Almond Oats

A bag of apples or pears from Bishops Orchards* is just about the most inspiring thing I can have in my kitchen. From October till they disappear around February or March I keep these apples cooking in my oven or on my stove top. I love them warm: they make a delicious treat for breakfast or dessert and allow me to bake without using any sugar, PERFECT. For this recipe I use honey, but you can bake them with a few spices and their natural sugars concentrate in the oven.

Generally I slice up as many apples or pears as will fit in a pan add a little cider, some cinnamon bark or cardamom pods and bake. Sometimes I make a crisp by adding a sweet oat or flour crumb topping.  For this deconstructed apple crisp variation, I roasted the apples in the oven and made the oat topping in a frying pan. The apples could also be made in a frying pan if you don't want to turn the oven on.

Spice Roasted Apples with Honey Glazed Almond Oats
For the apples:
8 firm apples such as Fuji or Braeburn that don't mush when they cook.
1/2 cup water or cider
2 tablespoons honey
1 tablespoon butter
A sprinkle of any spices you like, I used cinnamon, nutmeg & cardamom
  1. Sliced apples in half. Remove seeds if you like, or leave them as is if you're feeling too lazy.
  2. Placed apples in a roasting pan face up with a little cinnamon, nutmeg and cardamom (clove or allspice would also be nice) and a splash of water, then roast them at 400 degrees until tender. 
  3. In a frying pan add a drizzle of honey (1 to 2 tablespoons), a slice of butter, and any juices from the roasting pan. Simmer until bubbling rapidly. Glaze each apple in the heated honey and set on a plate. 
For the Almond Oats:
2 tablespoons honey
1/2 cup sliced almonds
1 cup dry rolled oats
1/2 teaspoon cinnamon
pinch salt
  1. In the same frying pan, add 2 more tablespoons honey, a teaspoon of water, a pinch of salt and some butter (optional), heat until bubbling rapidly. Add sliced almonds and toss to coat, continue tossing and cook for 20 seconds on medium heat, add dry rolled oats, cinnamon and salt, toss until well coated and toasty hot. 
  2. Serve warm apples with hot honeyed almond oats and a spoonful of yogurt or whipped cream (plain or sweetened with a pinch of sugar and cinnamon). Enjoy!
* tip for you super local folk in New Haven, CT - bags of apples from Bishops Orchards are available at Edge of the Woods for only $3.99, way cheaper than at the orchard itself. It's a great way to get locally grown apples well past the pick-your-own season. These are not organic, but they are IPM and very minimally treated, and no wax.

Saturday, July 21, 2012

Raw Summer Cereal

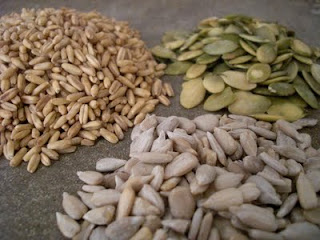
Last summer I posted this delicious and very healthy recipe for a raw/live cereal. With blueberries and peaches in season right now, this is the perfect time to make this! The oat groats, pumpkin seeds, sunflower seeds and almonds can soak in water over night to "sprout" them and activate the energy in the seeds. You drain it in the morning and serve with yogurt and fruit. It is so refreshing, delicious and energizing to eat. I'm often partial to toast for breakfast, but when I remember to soak some grains and nuts for this wonderful dish packed with protein from the nuts and yogurt, I get up from breakfast feeling energized rather than sluggish.

Oat Groats are available from any health food store, and in the grain section of some regular stores.

For fruit picking info:
www.pickyourown.org

In CT:
www.buyctgrown.com

Enjoy!


Sunday, February 26, 2012

Muffins for a Cool Winter Morning

Life has been a little crazy lately, and my blog posts seem to be forming themselves more in my head,  than on my computer... So, while you wait for some new posts on food justice, urban agriculture and delicious food, you might take another peak at this healthy buttermilk muffin recipe from a while back (you don't actually need to have buttermilk to make them, check the recipe below!). I just made a batch, and they are warm and tasty, perfect for a cool winter morning.

Buttermilk Muffins with Molasses, Orange and Currants
12 muffins

1 cup unbleached white flour (I used white spelt)
1 1/3 cup whole wheat or spelt flour
1/4 cup dry millet
1/3 cup molasses*
1/4 cup agave* (or honey or maple syrup)
1/4 cup sugar
2 teaspoons baking powder
1/4 teaspoon baking soda
1/2 teaspoon salt
1/2 teaspoon powdered ginger
zest from one orange
1 egg beaten
3/4 cup buttermilk (you can substitute 3/4 cup milk or soy milk plus 1 teaspoon vinegar or 1 tablespooon orange juice)
2/3 cup oil
1/2 cup currants (or other dried fruit)

1. Preheat oven to 375. Grease or place muffin papers in one muffin tin (12 muffins).

2. Mix the wet ingredients together, including the zest.

3. Sift the dry ingredients together and stir in the sugar.

4. Mix the wet and dry together and carefully fold in the blueberries.

5. Bake until a cake tester comes out clean, about 20 minutes.

* if you don't have agave or molasses, you can use honey or maple syrup. You can also replace both ingredients by using a total of 3/4 sugar in the recipe.

What have you been baking lately?

Thursday, December 8, 2011

Cardamom Bread Time

As xmas draws near, the Jew in me has some sweet envy. While I start thinking about fried potato lakes and jelly doughnuts for the celebration of Hanukkah, the world around me is ablaze in candy canes and gingerbread houses. I am lucky that I get to enjoy some of the xmas festivities with extended family and in-laws, and share in some of their distinctive traditions. I posted about this cardamom bread last year. It is a fabulous Swedish bread, and as Cardamom is hands down my favorite spice, I just must repost this for your baking pleasure!

Read Cardamom Bread Post

Thursday, October 27, 2011

Apple and Cider Crisp

I created this delicious low sugar apple crisp recipe last fall, and now that the weather has turned cool, I've started to make it again. I can tell it is going to be a staple for the next few months, so I wanted to re-post the recipe. If you want to simplify it event further, just apples, cider and a bit of cinnamon for the filling works great, and a 1/4 recipe tossed in a small oven-safe skillet to cook during dinner makes an easy, healthy dessert.

Tuesday, October 25, 2011

Arepas

While I'd like to say that I discovered these wonderful corn "pancakes" while traveling in Colombia, or at my Venezuelan friend's house, I actually owe my love of them to the streets of New York. I first encountered arepas more than a decade ago in the generic street fairs that squeeze onto the streets of New York during the summer and fall. Under the arepa vendor's tent there was a large griddle perpetually covered with yellow sweet corn arepa pancakes, speckled with corn kernels and melted cheese in various stages of done-ness, (if that's even a word). The first time I ate these I went right home and tried to make them with some fine cornmeal I had in the kitchen; the result was a pasty inedible mess. It wasn't till years later that I found arepa flour, which is a precooked corn meal, and discovered the simplicity of making them at home. I think Goya makes a brand that is widely available, but I have not used it. The Doñarepa brand is delicious, as I'm sure many of them are. From what I can tell each country or region seems to have one favorite brand, some yellow, some white, so you'll have to try them out to see what you like.  I must say, generally I try to buy organic corn products because they are one of the most highly genetically engineered crops, but this is one of the few exceptions I make because those darn arepas are so addictive, and the memories of the sweet hot corn pancakes in NYC just never seem to be satiated no matter how many of these I make at home....

Sweet Corn Arepas
Follow the instructions on the package if different from these.
The fresh corn and cheese are optional as well, you can make arepas with just the arepa corn flour and water. 


1 cup yellow arepa flour
1 cup warm water
1 tablespoon butter (optional)
1/2 salt (or to taste)
1/2 teaspoon sugar (optional)
1/2 cup fresh or thawed corn kernels
1/4 cup finely chopped mozzarella or fresh cheese
oil for cooking


  1. Mix warm water and arepa flour, sugar, salt and butter until it forms a moist but not sticky dough. let sit for 10 minutes. If it gets dry add a bit more water. Mix in the corn kernels and cheese. 
  2. Form the dough into balls and then flatten into pancakes between your hands. You can also roll the dough into a log and chill in the refrigerator for 1 hour to 2 days until you are ready to cook them, then slice the dough into rounds. Cook arepas in a hot pan with a small amount of oil until browned on both sides.
Arepas are delicious with eggs, beans, meat, vegetables, for breakfast, lunch or dinner.  For this meal I served them with black beans with small pieces of pan fried maduros(sweet plantain), sautéed Kale and peppers with caramelized onions and a bit of pan fried queso fresco, a mexican fresh cheese. 

My 3 year old was well occupied during all this cooking with a hand full of arepa dough. She rolled and patted her way right through until dinner was ready. It always amazes me how easy it is to engage kids in the cooking process when I have the energy to do it....


There is a very well known arepa restaurant in NYC which makes the white corn variety common in Venezuela. These are a bit puffier and are sliced open and stuffed with delicious fillings.
Check out the Caracas Arepa Bar for more info.

In New Haven, CT a popular spot for yellow corn arepas is Manjares cafe.


Do you LOVE arepas too?
How do you make them?
Please share by commenting below!


Monday, September 5, 2011

Live Food


Live Food.
If your mind conjured an image of you biting into a live fish, it's tail flapping water in your face, you can relax. When I talk about live food I mean plant based food that has the energy used to grow itself still inside of it. I know this might sound hokey, but compare a fresh green bean to one from a can, or think about how good a recently picked carrot is compared to one that's been sitting in your fridge for 2 weeks. 

Live food is a little different from raw food, which may be uncooked, but not "living". As an example, an almond is raw if it has not been roasted, but an almond is a seed, and if you soak it in water over night it will start the process of sprouting and starting to grow into an almond tree, this makes it live, not just raw. I often hear myself telling my kids they need to eat something fresh so they can get  "growing energy from their food", that they need to grow their own bodies. I like thinking about food this way, rather than just telling people to "eat their vegetables" I try to focus on eating enough fresh live food to balance out all the rest of the food in my diet. (Check out this fun recipe for Almond Milk using "live" almonds.

As for me, well I love carbs for breakfast. Toast, cereal, muffins, scones are all high on my list of favorite early morning eats. The thing is, if I eat too much of them I get tired. This summer during my dance camp vacation, I discovered a wonderful new breakfast treat that walks a perfect line between carbohydrate and live food, making it better balanced once it is digested, so I feel great after eating it, not ready for a nap. 

Live Museli, you are my new favorite breakfast!
Credit to one of the great Dance New England cooks (not sure which cook though...)


Live Museli
Makes 4 servings
1 Cup  oat groats
1/4 Cup  raw sunflower seeds
1/4 Cup  raw pumpkin seeds
1/4 Cup  raisins
1/4 Cup raw almonds
Fresh fruit such as peaches, plums, apples, pears or berries - (about 2 peaches or apples and or one cup of berries)

1. Place all ingredients except for fresh fruit into a bowl or pot. Fill the bowl or pot with water, about two inches above the grains. Cover with a towel or pot top and let sit over night or for 6-12 hours. 
2. Drain off the water. Scoop about 1/2 a cup of the live grain/seed mixture into a bowl. Add some cut up fresh fruit, yogurt and honey are also nice additions if that sounds good to you.
note: I didn't have any almonds when I made this batch, but it is so much better with them!!

This breakfast always leaves me feeling satisfied and energized. I hope you enjoy it too!

Tuesday, July 5, 2011

Strawberry Jams - The Best I've Ever Had

This late night experiment in Strawberry Jam making was thrilling, exhausting, and luckily successful! Thank god, because if I had wasted 6 pounds of gorgeous fresh picked berries, on some gloppy mess of jam, I don't think I would have gotten over it so easily. 
As soon as Strawberry season hit I found the first available moment to grab my 3 year old daughter and head to the fields. In what must have been the hottest hour of the summer yet, we picked 15 pounds of gorgeous strawberries. Heading home with stained fingers and full bellies I placed the huge mound of berries on the counter where they sat, waiting to be cleaned. It wasn't until late that night that I managed to make space for some of the strawberries in the fridge, and two days later that I found time to trim them and start making some jam.

Usually making jam, (which I have done only a few times, and never with strawberries) would be a well thought out process with plenty of time and preparation. In my busy life, this was far from the case. I was making dinner for my family after a busy work day and noticed a few of my precious berries starting to rot. I dropped my parental responsibilities and started slicing berries into a pot, the pile of red juice stained strawberry leaves growing next to my forgotten plans for dinner. Needless to say my kids were hungry and fussy, and it was a long long night, but in the end, worth the effort! Thank goodness I had done some preparation; finding a no pectin strawberry jam recipe on line the night before, and purchasing some jam jars for canning from the grocery store.
 
The thing that makes jam or preserves thick is pectin. Some fruits like apples, lemons or raspberries contain it naturally, some fruits you need to add pectin either by mixing them with a pectin rich fruit or by purchasing pectin, (some is natural, some is manufactured and has preservatives, so read the labels). Some pectin can make jams cloudy, and if you use too much it can make your jam turn to jello. I didn't have any pectin, and I liked the idea of trying to make the jam without adding something out of a box. A google search resulted in a great recipe that used green strawberries as source of pectin, YES! The recipe also utilized a technique that I had developed for making strawberry ripple ice cream. To keep the fresh taste of the fruit, and not turn the gorgeous red berries into a light pink murky mush, you macerate the strawberries by tossing with sugar and mashing them, releasing their juices, then strain the juice from the pulp. 
The strawberry juice is boiled with sugar (I cut the amount by more than half and it still worked!) until it reduces down and the sugar reaches a high temperature and thickens. 
The fruit pulp is added in at the last minute and brought to a boil and then turned off, so it tastes fresh and maintains a deep red color, more reminiscent of raspberries than strawberries. A handful of green strawberries worked as the pectin, and since I wasn't certain of their thickening power, I added the pectin rich white pith and seeds cut from a lemon, wrapped in cheese cloth (a trick I learned from making meyer lemon jam in the winter). As the finishing touch I added fresh herbs: lemon verbena to two jars and thyme to one. Both herbs proved to be exceptionally delicious, and a spoonful of this jam on my morning slice of toast or on top of a bowl of yogurt is an incredibly wonderful tiny gift, and worth all of the effort and late night mess the project demanded!

The Best Strawberry Jam - No Pectin 
Adapted from Cincinnati Locavore Yield: approximately 1 quart or 4- 8oz jars of preserves

2 quarts strawberries, a few slightly unripe and green ones, slightly mashed
2 to 2 1/2 cups Sugar (about 
1/2cup to 2/3cup per cup of mashed berries)*
Seeds and white pith from 1 large lemon or 2 small lemons (you can add some lemon juice too if you like the flavor)
Thyme or Lemon Verbena - 4 sprigs (optional)

  1. Fill canning kettle with water to cover 1/2-pint jars by 2 inches, cover, bring to a boil, and keep it there.  Set 1/2 pint (8-oz) jars and lids into a pan of hot water over lowest heat. Alternately you can wash, dry and bake the jars at 225 degrees fahrenheit for 20 minutes. 
  2. Wash and hull strawberries. Mash berries by hand or with a stick blender. Strain  juice into a big heavy bottomed pot, reserve pulp. Add sugar to juice in the pot.
  3. Wrap lemon seeds and pitch in a piece of cheese cloth or a thin piece of un-dyed  fabric, tie with a string and add to the pot. 
  4. Bring juice, sugar and cloth bundle to a rolling boil, stirring occasionally. Reduce heat slightly and continue to cook juice at a low boil until it reaches 220 on a thermometer or when a drop put on a cold plate (put one in the freezer) has a bit of a jelly texture, so you know it has thickened.  
  5. Add reserved pulp and herbs if you are using them. bring to a low boil for 2 minutes. Pour into sterilized jars if you are canning them for storage, or into clean jars if you are just putting it in your fridge to consume in the near future!
If you are canning the jam:
Fill jars leaving 1/2" headroom. Wipe jar rims with damp cloth, cover with hot lids and screw on lid rims without tightening. (The lid rims are only there to hold the lids in place during processing; tightening them can both interfere with processing and cause you to dislodge the lids when removing the lid rims before storing your preserves.) Set jars into canning rack and drop into boiling water in kettle. Cover kettle and process 10 minutes, remove from water, and set on rack to cool. Once cool, check seals (press gently in the center of the lid -- if you feel a slight pop and the center flexes down and then back up again, the lid didn't form a seal and that jar should be refrigerated and used within three months).

*Most jam recipes suggest using 1 cup sugar per cup of mashed berries. The sugar helps to thicken the jam, but to me, it's way too much sugar, so I cut it in half, and it still worked and was delicious!

I picked my berries at Jones Family Farm (the green ones were from my tiny patch in the backyard)  To find a pick-your-own spot near you check out: pickyourown.org or in CT search Buy CT Grown. 


What do you do with your Strawberries?