Thursday, December 12, 2013

Easy Cheesey

I kid you not when I say this is the easiest cheese to make ever! I whipped this up in just a few minutes before my guests arrived, so keep it in mind for a last minute pot luck dish or special addition to a holiday party. The recipe had been hanging on the side of my fridge for nearly 9 months. My son had brought it home from his after school program at Common Ground- urban farm and school (it was written in crayon in huge letters, if that helps you overcome the idea that cheese making has to be hard). This fresh cheese is a type of farmers cheese, soft and un-aged (as in it is only minutes old!).  To make this, all you do is heat milk to 180 degrees, stir in vinegar, pour the curds through a thin clean dish towel, chill and enjoy. That's it!
Easiest Fresh Cheese 
1/2 gallon milk
1/2 cup vinegar

1. Heat milk to 180 degrees F
2. Add vinegar, stir. Milk will curdle and the curds and whey will separate. 
3. Line a colander with a thin clean dish towel and pour the curds and whey in. Let the whey drain off. You can gently squeeze the remaining whey from the curds by twisting the dish towel, or just let it hang for a while. 
4. Separate cheese into two balls and season as you desire with salt, pepper, or any spices or herbs. 

For this party I made two small balls, one surrounded by roasted cherry tomatoes and thyme (the last from my garden a little while back). The other cheese, I seasoned with salt and pepper and smothered with honey. Citrus zest would be a great addition to this cheese as well. For winter when tomatoes are lacking, you could also pair this with chopped spiced nuts like these Orange Pepper Almonds or roasted delicata squash. 

The only downside to this cheese is that it uses a lot of milk. An entire half gallon of milk only yields two small rounds of cheese...which makes me think deeper about why cheese is so expensive.....

Do you have any homemade cheese recipes? Ideas for fun party appetizers? Please share!

Tuesday, December 10, 2013

Holiday Cookies & Treats

Not being Christian is a small hurdle to overcome when holiday sweets are at stake. I love that Christmas time brings about mass cookie making around the country. Family recipes, regional specialties and old time favorites emerge. Many years ago when I first met my husband we visited his mother's family in upstate NY; tins of cookies filled the house, old Swedish favorites, with lots of butter, nuts and cardamom, and much like my first evening spent in Brazil many years before, where I was handed a bowl of thick dulce de leche caramel and a spoon, my heart was overcome with sweetness and I was in love. 

This year for a holiday party I decided to make my all time favorite cookie, which conveniently happens to be of the Jewish variety, and one I haven't made for years. This recipe for rugelach (the cookie pictured above) comes from the first bakery I worked in in Brooklyn in the mid '90s: Margaret Palca Bakes. We made cookies and cakes in a tiny kitchen and shop on the ground floor of her family brownstone in Carol Gardens. The treats were sold at places like Dean and Delucca, and the rugelach were by far the most buttery, chewiest, most wonderful rugelach I had ever had. Her secret is using powdered sugar in the dough, along with the usual cream cheese. I hope she doesn't mind me posting the recipe here, all these years later!!

I put chocolate in some of these (see below), but I think they were better with only the jelly and nuts for the filling!


Rugelach
adapted from Margaret Palca Bakes
makes 80 cookies

14 tablespoons butter
8 ounces cream cheese
2 cups flour
1/2 cup powdered sugar

1 cup Jam or jelly  of your choice (apricot or raspberry are the classics)
1 1/2 cups walnuts or pecans finely chopped
2 tablespoons sugar
1 teaspoon cinnamon (optional)


  1. Line 3 baking pans with parchment paper or butter very well. Cream butter and cream cheese till very fluffy, add sugar and flour until well combined. 
  2. Split into 5 rounds*, wrap in plastic wrap and chill for at least 1 hour, or overnight. Lightly flour one dough round at a time and Roll out between two sheets of wax paper, about 10 or 12 inches in diameter. 
  3. Mix nuts, cinnamon and sugar together. Blend jam in a food processor or melt and cool it to make it easy to brush onto the soft dough. 
  4. Working with one round at a time, brush with a thin layer of jam, and sprinkle with crushed nuts mixture. Cut round into 16 wedges (like a tiny pizza), roll them up from the outside edge inwards and place on baking sheet. 
  5. Bake at 350 till very golden. I didn't time these, but I think about 18 minutes or so... Must cool completely to come off of parchment paper.
* You can make 2 or 3 rounds in a batch and keep the rest in the freezer for later if you like. 

Here are some other great holiday treats from years past:

Cardamom bread - this recipe could be made even more delicious by adding a layer of almond paste to the center before braiding. 


Cocoa Walnut Raw Truffles - a delicious, beautiful and healthy sweet, just nuts, cocoa and dates. Again, you could alter this recipe by adding some spices like cinnamon, clove or cardamom, citrus zest, or by switching the type of nuts for a wide variety of fabulous truffles. 


Honeycomb Candy - an all around amazing sweet. 


Do you have any fabulous cookie recipes or family favorite holiday treats? Please share!!

Monday, December 2, 2013

Sufganiyot - Hanukkah Doughnuts


The synchronism of Hanukkah and Thanksgiving this year, was really just a bit too much for me. As much as I love pie and latkes, I don't really need to eat them together, or even in the same weekend. So it is pretty crazy to think that at this very moment on the 6th night of Hanukkah, a Monday evening, only 4 days after Thanksgiving, I am preparing doughnut dough and re-setting my Thanksgiving table for 12. An impromptu party with some of my childhood friends and their kids for a fun Hanukkah night. 

I couldn't really bring myself to make latkes again, and I hadn't made any doughnuts yet (Sufganiyot are the Israeli jelly doughnuts often made on Hanukkah).  I invented this doughnut recipe a few years back by altering a basic challah recipe, which is pretty similar to a yeasted doughnut dough. If I can muster any more energy, I just might thaw some of my summer strawberries and make fresh jam to fill these bad boys.

If you are still in the mood for Latkes this year, here is my recipe.

Happy frying.
Tagan

Sunday, November 24, 2013

The Amazing Pomegranate Trick

If I hadn't tried this myself, I'm not sure I would have believed it, but it really does work! A simple technique to get the seeds out of a pomegranate in just a few seconds, with no mess!!! You just cut the fruit open, only through the skin, and then whack the back of it with a wooden spoon. Yes seriously, it's that simple. Watch the videos for the precise technique (the guy is a little over excited, but it's worth it). 

Despite the complication and high staining potential of these lovely fruits, I have never shied away from them. I even remember my Jewish mom sending me to school with a big chunk of one when I was a kid. However, now that I have learned this, I think we'll be eating a lot more of them!! They are an amazingly delicious and healthy winter fruit, and will certainly be gracing our Thanksgiving table...maybe on the salad..... 


Let me know if you try this!

Sunday, September 29, 2013

Purple Popcorn=Pure Joy

The kernels from this lovely corn were a gift to me 5 years ago, by a wonderful student at the Yale School of Forestry. He came to meet me at my house, shortly after the birth of my second child, and brought this beautiful heirloom Japonica corn seed as a gift. Needless to say, between having two children, working, and having a small yard with only 6 hours of sun (not nearly enough for corn)...five years went by and this seed sat dormant in my kitchen drawer not seeing the light of day. This year, I finally thought to pull it out and plant it at my kid's school garden; a lovely garden with southern exposure and not a drop of shade all day long. Miraculously the two little rows of five-year-old corn seed sprouted stalks and grew to about 6 feet tall. We harvested a few ears of corn, pealed back the husks and discovered purple, and garnet colored kernels, hard to the touch, and realize we had no idea what to do with this corn. I couldn't imagine that it was only ornamental, after all, it was given to me by a food lover. I figured it could be ground for corn meal, but since I don't have a grain mill, and didn't much feel like doing it by hand, I went for popping first. And, to the great pleasure of my popcorn loving family, it worked. Purple popcorn=pure joy.

To pop your own corn: pick the kernels off the cob, put 1/2 cup to 1 cup of them in a heavy bottomed pot with a few tablespoons of oil, cover and shake over high heat until the corn starts popping. Shake vigorously so the corn doesn't burn. If it sounds like there is not enough room for the corn to pop (muffled sound) pour some of the popped corn into a bowl, and continue popping the rest in the pot. When the popping stops, the corn is done. Wipe out the pot with a towel, toss in a few tablespoons of butter, the heat of the pan will melt it. Drizzle over popcorn, toss, sprinkle with salt, toss some more and you are done! For a fun variation, try a little Sambar curry powder and a pinch of sugar or honey. 

Inspired? Please share!

Saturday, September 14, 2013

Roasted Tomato Sauce

September brings the start of school, lots of Jewish Holidays and not enough time to deal with all the tomatoes in my backyard. My quick and easy solution is this roasted tomato sauce. It can be done in a frying pan or a big roasting pan, depending on how many tomatoes you have. If you have a few extra minutes you can take the time to sauté the onion and garlic first, if not, just chop it up, toss it with an assortment of tomatoes (whole or cut), some olive oil, salt, pepper and some fresh basil, or other herbs like marjoram, oregano or thyme, and pack the whole thing into the oven at about 425 degrees. If you are in a real rush to get dinner on the table, do a quick sauté of all the ingredients on the stove top and then stick it under the broiler. Stir occasionally so the tomatoes don't burn, and in a few minutes, you have sauce. Enjoy it as is, tossed over pasta, in rice, greens, meat or beans or puree it a bit for a more traditional tomato sauce. If you happen to have an over grown zucchini lurking in the backyard too, split it open, remove the seeds, and dice it up for sauce.  
Frying pan version: I sautéd the ingredients before sticking them under the broiler.

Roasting pan version: I split the larger tomatoes, tossed all the raw ingredients with olive oil, salt and pepper and put the whole pan in a 425 degree oven. Siting occasionally until the tomatoes were very soft with lightly browned edges, about 45 minutes. 


The sauce is great with the roasted whole tomatoes as is (in the photo at the top), or give it a quick puree in a blender or with a stick blender, and enjoy.


If you want to grow tomatoes next year, all you need is a sunny spot, a big bucket, some good dirt and a little $3 plant (try a sun gold orange cherry tomato, it's especially prolific).  If you are fortunate enough to have lots of tomatoes to work with, what do you do with them? 

Friday, August 23, 2013

Pie Contest In Photos

What an incredible night this was! We thought we might get 40, maybe 50 pies, but no, we got 86 pies for the first ever CitySeed Pie Contest to benefit the SNAP (Food Stamp Double Value program). The event was an amazing partnership with On9 and so many generous donations were made from 116 Crown, Ashley's Ice Cream, Amity Wine&Spirits, and so many others!! We can't wait for next year!!
(Although I don't know if I can say the same for the poor judges who had to taste 86 pies!!!)


Thanks to the fabulous Dj Toot-Skee, who had us all jammin' in the street (working off the calories, as we put them on!) The pie above was made by the 4 year-old group at Creating Kid's preschool, and won best pie made by a kid!
 The judges deliberating!


 The fab folks at 116 Crown, mixed up a great blueberry lemonade cocktail with berries donated by Jones Family Farm (and picked by me!), and fresh herbs from Common Ground School Farm!
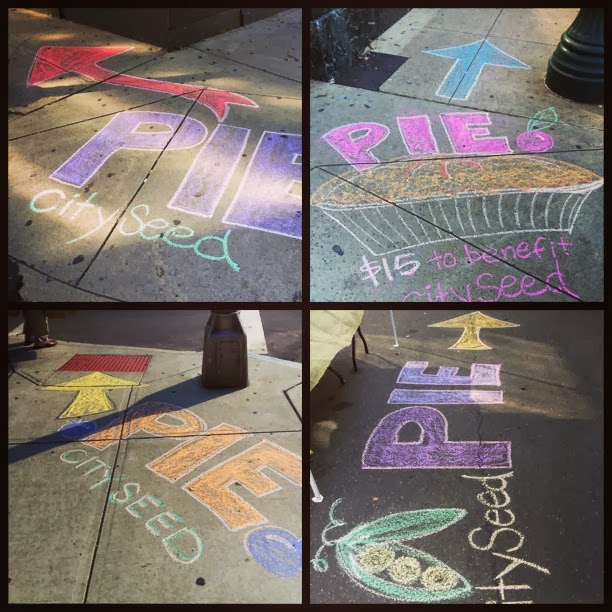
And what would we have done without the amazing chalk art by Amy Christensen of Elm City Market (and the crew of kid artists!!)  
Many thanks to all the incredible New Haven community members of all ages who baked delicious homemade pies! You all helped to make this event an incredible success for our the Food Stamp Double Value program, and also for the pure blessing of people coming together around good food. Here's to YOU and here's to PIE!!  

Friday, August 2, 2013

Pie Contest Block Party Friday August 2nd!!

It's Here! The Pie Contest and Pie Party to raise money for CitySeed's Food Stamp Double Value Program. It's gonna be a fabulous party in the street with tons of pie, Ashley's Ice Cream, Dj Tootskee, a Cash Bar by 116 Crown and some fun kid activities!

If you didn't buy tickets online, you can still get them at the event (cash or credit card).

If you want to help out, serve pie, paint faces or serve drinks...come on down to 71 Orange St in New Haven, CT Friday August 2nd. Party is 6-8pm, Volunteers come around 4:30 to help out!

Our celebrity judges include Mayor DeSetefano, Nadine Nelson of Global Local Gourmet, Colin Caplan of Taste New Haven, Matt Finer of Devil's Gear Bike Shop (he can handle eating all that pie!), Joanne Sculli of Solar Youth (a self proclaimed pie lover), and Alex Biker of Marjolaine Bakery.

There are lots more details on our website if you are interested in making a pie, or just want to know more!

It's the hottest party in town tonight! Hope to see you there!