Friday, January 31, 2014

Mochi, Another Chinese New Year Treat


As you may have discovered from my blog, I have a bit of a sweet tooth. This particular treat, Mochi or pounded sweet rice,  rises above many in my heart, so much so that my husband started calling me "Mochi Lady" more than 13 years ago, and still does to this day. This post is rather long, which might give you an idea of just how much I love mochi. And, while the chewy, sticky texture of this lightly sweetened rice cake is not so familiar to most Americans, it is something worth exposing yourself too at least once!


Mochi is a not too sweet treat, made by people in almost every country in Asia, and is one of the foods eaten on Japanese and Chinese New Year, which are this month. Various types of cooked glutinous rice or sweet rice flour are pounded or mixed to make a sticky mochi dough which is most often filled  with sweetened red bean paste, but may also have an assortment of fillings (like the ones I bought pictured above), with chopped peanuts and coconut, lotus seed, sesame paste, taro or other fillings. The red bean variety is often available in take-out sushi restaurants in the USA, as well as any Asian market in either the refrigerated or dry good self area. 

The skillful process of pounding glutinous rice into mochi has become a bit of a spectacle, showing up on japanese game shows and tons of youtube videos, like the one below, keep watching to the end to see the incredible speed they hit!
Many years ago a friend of mine from the Philipines, knowing of my love of mochi, shared an incredible homemade treat made by her family back home, and sent to her in a care package. It was a seasonal specialty in the Philipines: early spring mochi made from the first grains of fresh green spring rice, pounded, sweetened and flattened between two sheets of plastic. It was an amazing, chewy, slightly sweet, nutty and fresh, handmade by her family and sent half way around the world. It was a gift I will never forget!  I could not find any photos or recipes on google exactly like what I ate that day, but this is somewhat similar: How to Make Kalamay na Pinipig 

Over the years I have made mochi at home only a few times. Once from fresh sweet rice which I soaked overnight, steamed and then "pounded" using the paddle attachment in my stand mixer. Last year, I decided to try using the Mochiko rice flour (pictured in the box at the top). I do not have a microwave, so followed the stovetop directions for cooking the mochi dough. Here is a good video for a Korean style mochi, and she shows how to make the red bean filling using adzuki beans.

Below are some pictures of my mochi making adventure with my kids, who share my love of mochi.  First we made the red bean filling and scooped it into small balls ready for filling the mochi dough. Then made our dough from the glutinous rice flour, and tinted it pink with a few drops of food coloring.

 Below: cutting the dough into 1 1/2 inch squares, then filling them with red bean paste, pinching the dough closed and rolling the mochi round and flat.


To make Red Bean Filling:

  1. Put one cup of adzuki beans in a heavy pot with 3 cups of water, cover and bring to a boil over medium high heat for 10 minutes.
  2. Lower heat and simmer for about 1½ hours.
  3. If the beans haven’t softened after 1½ hours, add more water and cook over low heat until they are soft and can be well mashed.
  4. Mash the beans with a wooden spoon (or food processor) until smooth.
  5. Put the beans back into the pot and add ¾ cup light brown or raw sugar, ¼ tsp salt, 1 tsp vanilla extract, and 2-3 tbs rice or corn syrup.
  6. Stir with a wooden spoon over low heat until the sugar is dissolved and the paste looks a little shiny.
  7. Using spoons, divide the bean paste into one inch balls (or smaller depending on the size mochi you want to make.  

To make Mochi:
Mochiko is the only brand of glutinous rice flour I have seen in the USA. You must use glutinous or sweet rice flour for this, regluar rice flour will not work. Most recipes online use a microwave, you can do that if you like. I made mine on the stove top and it was great. 

3 Cups water
1 box (16oz or two cups) Mochiko glutinous rice flour  
1/2 cup granulated sugar
pinch salt
2 drops food coloring if desired.
  1. Put water, sugar, salt and food coloring in a pot and bring to a boil.
  2. Stir in Mochiko flour and simmer stirring constantly, until the dough forms a thick smoth paste, about 3 minutes. 
  3. Sprinkle the counter with tapioca or corn starch and spread the dough our sprinkling the top with starch as well. 
  4. Cool and cut into squares for filling with red bean paste, or anything else you like. shredded coconut and peanuts are a great combination too!
  5. Mochi must be eaten within a day or two, and should be kept at room temperature, it will get hard if refrigerated. 
There are many other kinds of mochi, which if you decide you like it, you can start to discover. For Americans, there is this variety that you can find in most health food stores. I was raised eating this type, toasted and topped with a little butter and maple syrup, a New England twist. 


I usually keep sweet rice or glutinous rice in the house, since when it is cooked or steamed you get sticky rice, which we love as well. It can be turned into little balls and sprinkled with sesame, or rice seasoning, which makes a great treat for little (or big) kids. 

 Have you had mochi? What do you think?

Tuesday, January 21, 2014

New Year

It's only been a few weeks since the new year started, but to be honest, it feels like months have gone by. I love new beginnings and special holidays with family, so I feel sort of nostalgic for the holiday just past. Lucky for me, I celebrate four new year holidays each year, and each in a different way: Western New Year, Chinese New Year, Rosh Hashanah (Jewish New Year) and my birthday (personal new year). Chinese New Year is coming up later this month, and I am working on a post about Mochi sweets which are traditionally eaten on this holiday, but to start getting you inspired for this holiday, I thought I'd include this post about homemade dumplings, which we sometimes make for Chinese New Year, Western New Year...or just for a fun dinner.

The dumpling "skins" or dough (bottom right above) can be found at any asian market, but often in a good regular grocery store at the end of the produce isle, near the tofu. You can fill these with whatever finely chopped ingredients you like, tofu, vegetables, meat and add some garlic, scallion, grated ginger, salt or spices. Steam boil or pan fry and your are done.


It's a bit of a messy project, but great fun for kids or a party night with friends. One of my favorite kids books describes family dumpling making, Mochi, and New Year in the most wonderful way "Dumpling Soup" is well worth the read! 

I don't really use a recipe when I make dumplings. I toss together different ingredients that I might have in the fridge and season as I said above with garlic, ginger, salt and spices. The typical fillings I use are: tofu (pressed and crumbled), scallion, blanched mung bean sprouts, finely chopped mushrooms, or shredded carrot. Traditionally, the dumplings are made with pork, if you'd like you can use any ground meat, season it well, and fill dumplings with a small spoonful in the middle, use your finger to wet the edge of the dough with water, hold the dough in half and pinch it tightly closed, overlapping the seam as you go. If that is too complicated, you can just fold them in half and pinch the edges together. 


Once you have made a batch of dumplings, you can steam, boil or fry them. I served these up with some sautéed pea greens from the Asian Market, totally out of season for the north-east in the winter, but a joy to eat, and a great way to start another new year. 


Here are some links to some traditional dumpling recipes:
Homemade Chinese Dumplings - Jiao Zi - This has great photos to show how to pinch the dumplings closed.  

For dipping, you can buy a "dumpling dipping sauce" or make your own by mixing: 2 crushed cloves of garlic, 3 tablespoons soy sauce, 2 tablespoons Chinese rice vinegar, 2 teaspoons toasted sesame oil, 1 teaspoon hot chili oil (or other hot sauce)

Beyond this, get creative: sweet, savory, curry, sweet potato, banana and chocolate..... whatever your heart desires. 

UPDATE 1/29/14: Check out my friend and cousin, Nadine Nelson of Global Local Gourmet demonstrating how to make delicious Golden Chicken Spring Rolls. 

So, are you going to make some dumplings...or did this scare you off 
and you're headed to the store to just buy some?

Saturday, December 14, 2013

Four and Twenty Black Birds Pie Book

As some of you might know I have a particular sweet spot for pie. So, when my dear friends showed up at my 40th birthday party with the new Pie Book from the famed Brooklyn pie shop Four and Twenty Blackbirds, well, I was pretty darn happy. Conveniently, this occurred the week just before Thanksgiving, so I thought I'd swap out my favorite pie dough this year and try out theirs, and let's just say I we were not disappointed! It is a very similar recipe, including the vinegar, but theirs has a bit more, and they spoon the ice water in 2 tablespoons at a time. The dough is tender, flaky and delicious. (If you want to check out my other favorite pie dough recipe click here.) What is amazing is that they make all ther dough for their pie shop by hand, including cutting in all the butter! I found that I could cut the butter in with a paddle attachment to my mixer just fine, but adding the water by hand a tablespoon or two at and time works great. 

Here is the link to the Four and Twenty Blackbirds shop: and their new new Pie Book which would make a wonderful gift for any avid or aspiring baker. The step by step instructions and photos are extremely well done. 

Four and Twenty Black Birds All Butter Pie Crust:
Author Notes: This is one of our staple crusts used at the shop. It's also featured in a variety of our pies included in THE FOUR AND TWENTY BLACKBIRDS PIE BOOK. - ElsenEM
Makes dough for one single-crust 9- to 10-inch pie or tart

  • 1 1/4cup unbleached all-purpose flour
  • 1/2teaspoon kosher salt
  • 1 1/2teaspoon granulated sugar
  • 1/4pound (1 stick) cold unsalted butter, cut into 1/2-inch pieces
  • 1/2cup cold water
  • 2tablespoons cider vinegar
  • 1/2cup ice
  1. Stir the flour, salt, and sugar together in a large bowl.
  2. Add the butter pieces and coat with the flour mixture using a bench scraper or spatula.
  3. With a pastry blender, cut the butter into the flour mixture, working quickly until mostly pea-size pieces of butter remain (a few larger pieces are okay; be careful not to overblend).
  4. Combine the water, cider vinegar, and ice in a large measuring cup or small bowl.
  5. Sprinkle 2 tablespoons of the ice water mixture over the flour mixture, and mix and cut it in with a bench scraper or spatula until it is fully incorporated.
  6. Add more of the ice water mixture, 1 to 2 tablespoons at a time, using the bench scraper or your hands (or both) to mix until the dough comes together in a ball, with some dry bits remaining.
  7. Squeeze and pinch with your fingertips to bring all the dough together, sprinkling dry bits with more small drops of the ice water mixture, if necessary, to combine.
  8. Shape the dough into a flat disc, wrap in plastic, and refrigerate for at least 1 hour, preferably overnight, to give the crust time to mellow.
  9. If making the double-crust version, divide the dough in half before shaping each portion into flat discs.
  10. Wrapped tightly, the dough can be refrigerated for 3 days or frozen for 1 month.
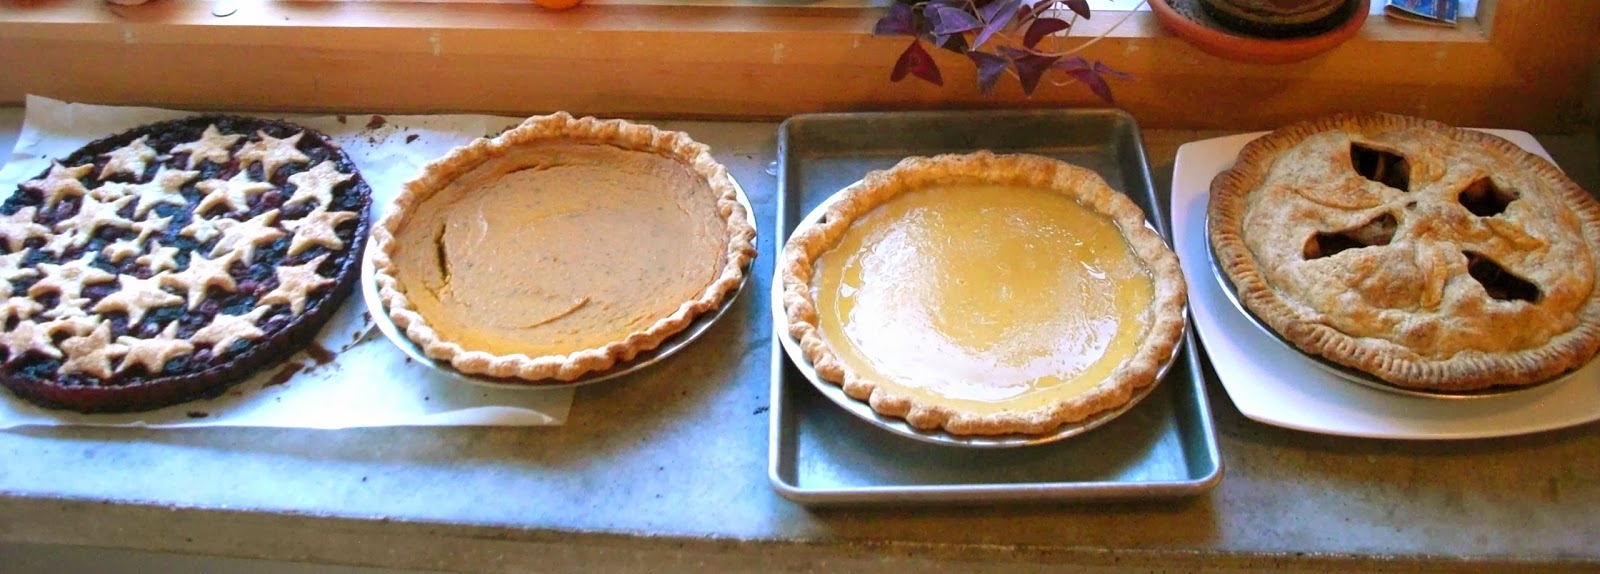
This Pie Party blog post has some great links to fun pie recipes too. Below is a cherry berry pie based on this cherry pie recipe form Melissa Clark. Mine is a mix of raspberries, blueberries and cherries cooked in a tart pan.  Hope you make some time for delicious pie baking this winter! it's a great excuse to turn the oven on!
And...please share your favorite pie recipes!


Thursday, December 12, 2013

Easy Cheesey

I kid you not when I say this is the easiest cheese to make ever! I whipped this up in just a few minutes before my guests arrived, so keep it in mind for a last minute pot luck dish or special addition to a holiday party. The recipe had been hanging on the side of my fridge for nearly 9 months. My son had brought it home from his after school program at Common Ground- urban farm and school (it was written in crayon in huge letters, if that helps you overcome the idea that cheese making has to be hard). This fresh cheese is a type of farmers cheese, soft and un-aged (as in it is only minutes old!).  To make this, all you do is heat milk to 180 degrees, stir in vinegar, pour the curds through a thin clean dish towel, chill and enjoy. That's it!
Easiest Fresh Cheese 
1/2 gallon milk
1/2 cup vinegar

1. Heat milk to 180 degrees F
2. Add vinegar, stir. Milk will curdle and the curds and whey will separate. 
3. Line a colander with a thin clean dish towel and pour the curds and whey in. Let the whey drain off. You can gently squeeze the remaining whey from the curds by twisting the dish towel, or just let it hang for a while. 
4. Separate cheese into two balls and season as you desire with salt, pepper, or any spices or herbs. 

For this party I made two small balls, one surrounded by roasted cherry tomatoes and thyme (the last from my garden a little while back). The other cheese, I seasoned with salt and pepper and smothered with honey. Citrus zest would be a great addition to this cheese as well. For winter when tomatoes are lacking, you could also pair this with chopped spiced nuts like these Orange Pepper Almonds or roasted delicata squash

The only downside to this cheese is that it uses a lot of milk. An entire half gallon of milk only yields two small rounds of cheese...which makes me think deeper about why cheese is so expensive.....

Do you have any homemade cheese recipes? Ideas for fun party appetizers? Please share!

Tuesday, December 10, 2013

Holiday Cookies & Treats

Not being Christian is a small hurdle to overcome when holiday sweets are at stake. I love that Christmas time brings about mass cookie making around the country. Family recipes, regional specialties and old time favorites emerge. Many years ago when I first met my husband we visited his mother's family in upstate NY; tins of cookies filled the house, old Swedish favorites, with lots of butter, nuts and cardamom, and much like my first evening spent in Brazil many years before, where I was handed a bowl of thick dulce de leche caramel and a spoon, my heart was overcome with sweetness and I was in love. 

This year for a holiday party I decided to make my all time favorite cookie, which conveniently happens to be of the Jewish variety, and one I haven't made for years. This recipe for rugelach (the cookie pictured above) comes from the first bakery I worked in in Brooklyn in the mid '90s: Margaret Palca Bakes. We made cookies and cakes in a tiny kitchen and shop on the ground floor of her family brownstone in Carol Gardens. The treats were sold at places like Dean and Delucca, and the rugelach were by far the most buttery, chewiest, most wonderful rugelach I had ever had. Her secret is using powdered sugar in the dough, along with the usual cream cheese. I hope she doesn't mind me posting the recipe here, all these years later!!

I put chocolate in some of these (see below), but I think they were better with only the jelly and nuts for the filling!


Rugelach
adapted from Margaret Palca Bakes
makes 80 cookies

14 tablespoons butter
8 ounces cream cheese
2 cups flour
1/2 cup powdered sugar

1 cup Jam or jelly  of your choice (apricot or raspberry are the classics)
1 1/2 cups walnuts or pecans finely chopped
2 tablespoons sugar
1 teaspoon cinnamon (optional)


  1. Line 3 baking pans with parchment paper or butter very well. Cream butter and cream cheese till very fluffy, add sugar and flour until well combined. 
  2. Split into 5 rounds*, wrap in plastic wrap and chill for at least 1 hour, or overnight. Lightly flour one dough round at a time and Roll out between two sheets of wax paper, about 10 or 12 inches in diameter. 
  3. Mix nuts, cinnamon and sugar together. Blend jam in a food processor or melt and cool it to make it easy to brush onto the soft dough. 
  4. Working with one round at a time, brush with a thin layer of jam, and sprinkle with crushed nuts mixture. Cut round into 16 wedges (like a tiny pizza), roll them up from the outside edge inwards and place on baking sheet. 
  5. Bake at 350 till very golden. I didn't time these, but I think about 18 minutes or so... Must cool completely to come off of parchment paper.
* You can make 2 or 3 rounds in a batch and keep the rest in the freezer for later if you like. 

Here are some other great holiday treats from years past:

Cardamom bread - this recipe could be made even more delicious by adding a layer of almond paste to the center before braiding. 


Cocoa Walnut Raw Truffles - a delicious, beautiful and healthy sweet, just nuts, cocoa and dates. Again, you could alter this recipe by adding some spices like cinnamon, clove or cardamom, citrus zest, or by switching the type of nuts for a wide variety of fabulous truffles. 


Honeycomb Candy - an all around amazing sweet. 


Do you have any fabulous cookie recipes or family favorite holiday treats? Please share!!

Monday, December 2, 2013

Sufganiyot - Hanukkah Doughnuts


The synchronism of Hanukkah and Thanksgiving this year, was really just a bit too much for me. As much as I love pie and latkes, I don't really need to eat them together, or even in the same weekend. So it is pretty crazy to think that at this very moment on the 6th night of Hanukkah, a Monday evening, only 4 days after Thanksgiving, I am preparing doughnut dough and re-setting my Thanksgiving table for 12. An impromptu party with some of my childhood friends and their kids for a fun Hanukkah night. 

I couldn't really bring myself to make latkes again, and I hadn't made any doughnuts yet (Sufganiyot are the Israeli jelly doughnuts often made on Hanukkah).  I invented this doughnut recipe a few years back by altering a basic challah recipe, which is pretty similar to a yeasted doughnut dough. If I can muster any more energy, I just might thaw some of my summer strawberries and make fresh jam to fill these bad boys.

If you are still in the mood for Latkes this year, here is my recipe.

Happy frying.
Tagan

Sunday, November 24, 2013

The Amazing Pomegranate Trick

If I hadn't tried this myself, I'm not sure I would have believed it, but it really does work! A simple technique to get the seeds out of a pomegranate in just a few seconds, with no mess!!! You just cut the fruit open, only through the skin, and then whack the back of it with a wooden spoon. Yes seriously, it's that simple. Watch the videos for the precise technique (the guy is a little over excited, but it's worth it). 

Despite the complication and high staining potential of these lovely fruits, I have never shied away from them. I even remember my Jewish mom sending me to school with a big chunk of one when I was a kid. However, now that I have learned this, I think we'll be eating a lot more of them!! They are an amazingly delicious and healthy winter fruit, and will certainly be gracing our Thanksgiving table...maybe on the salad..... 


Let me know if you try this!

Sunday, September 29, 2013

Purple Popcorn=Pure Joy

The kernels from this lovely corn were a gift to me 5 years ago, by a wonderful student at the Yale School of Forestry. He came to meet me at my house, shortly after the birth of my second child, and brought this beautiful heirloom Japonica corn seed as a gift. Needless to say, between having two children, working, and having a small yard with only 6 hours of sun (not nearly enough for corn)...five years went by and this seed sat dormant in my kitchen drawer not seeing the light of day. This year, I finally thought to pull it out and plant it at my kid's school garden; a lovely garden with southern exposure and not a drop of shade all day long. Miraculously the two little rows of five-year-old corn seed sprouted stalks and grew to about 6 feet tall. We harvested a few ears of corn, pealed back the husks and discovered purple, and garnet colored kernels, hard to the touch, and realize we had no idea what to do with this corn. I couldn't imagine that it was only ornamental, after all, it was given to me by a food lover. I figured it could be ground for corn meal, but since I don't have a grain mill, and didn't much feel like doing it by hand, I went for popping first. And, to the great pleasure of my popcorn loving family, it worked. Purple popcorn=pure joy.

To pop your own corn: pick the kernels off the cob, put 1/2 cup to 1 cup of them in a heavy bottomed pot with a few tablespoons of oil, cover and shake over high heat until the corn starts popping. Shake vigorously so the corn doesn't burn. If it sounds like there is not enough room for the corn to pop (muffled sound) pour some of the popped corn into a bowl, and continue popping the rest in the pot. When the popping stops, the corn is done. Wipe out the pot with a towel, toss in a few tablespoons of butter, the heat of the pan will melt it. Drizzle over popcorn, toss, sprinkle with salt, toss some more and you are done! For a fun variation, try a little Sambar curry powder and a pinch of sugar or honey. 

Inspired? Please share!